Welcome to our comprehensive Razor Clam Guide, where we’ll explore the fascinating world of razor clams, their harvesting techniques, and share delicious recipes to enjoy these delectable mollusks. Strap on your boots, grab your clam gun or shovel, and join us as we dive into the exciting realm of razor clamming!
Razor clams are remarkable creatures, equipped with an oversized foot that allows them to swiftly dig into sandy beaches up to three feet deep. They have a knack for habitats below the average low-tide mark, where the water is constantly in motion. With their population density reaching up to 200 clams per square yard, it’s no wonder that the technique of using a high-salinity solution to attract these clams has gained popularity.
In this guide, we’ll provide you with essential tips and techniques for finding and digging razor clams. We’ll also take you through a step-by-step tutorial on cleaning these clams, ensuring you have a mouthwatering and sand-free culinary experience. Additionally, we’ll share some fantastic recipes that showcase the unique flavor of razor clams, and provide a handy calendar with the best times to harvest them in different regions.
Whether you’re a seasoned clam digger or a curious food lover, our Razor Clam Guide is here to equip you with the knowledge and inspiration to embark on an unforgettable razor clamming adventure. So, put on your sea legs and let’s dive in!
Finding Razor Clams: Tips for Digging
When it comes to finding razor clams, it’s all about recognizing the telltale signs they leave behind in the sand. Keep an eye out for dimples, doughnuts, or keyholes—these are indications that a clam is hiding just beneath the surface. Once you’ve identified a potential clam spot, it’s time to gear up for digging.
To dig for razor clams, you’ll need a few essential tools and supplies, including:
- A clam gun or shovel
- Boots
- A shellfish license
- A headlamp for better visibility
- A net bag or bucket to collect your clams
With your equipment ready, it’s time to start digging. Position the blade of your shovel a few inches seaward of the clam show, and then plunge it into the sand. Lift the shovel upward and forward to remove sand, gradually uncovering the clam’s shell. Once you can reach the shell with your hand, gently pull it out of the sand.
Remember to be quick and efficient in your digging. Razor clams are known for their ability to burrow rapidly, so you’ll want to retrieve them before they have a chance to escape. Also, be mindful of your surroundings and avoid turning your back to the ocean to minimize the risk of unexpected waves.
To help you visualize the digging technique, here’s a step-by-step guide:
- Position the shovel a few inches seaward of the clam show.
- Plunge the shovel into the sand.
- Lift the shovel upward and forward to remove sand.
- Continue to remove sand until you can reach the clam’s shell.
- Gently pull out the clam by its shell.
Now that you understand the basics of finding and digging for razor clams, you’re one step closer to enjoying these delectable mollusks.
Cleaning Razor Clams: Step-by-Step Tutorial
After harvesting razor clams, it’s important to clean them properly before cooking to ensure a delicious and enjoyable dining experience. In this step-by-step tutorial, we will guide you through the process of cleaning razor clams to remove any sand, dirt, or unwanted parts.
Razor Clam Cleaning Materials:
- A bucket
- A damp cloth
- Boiling water
- Cold tap water
- A knife or clamming tool
Step 1: Rinse Off Sand
Start by rinsing off the sand from the harvested razor clams. Place them in a bucket filled with cold tap water and gently swish them around. This will help loosen and remove any excess sand or debris clinging to the shells.
Step 2: Prepare Boiling Water
In a large pot, bring water to a boil. You will use this boiling water to blanch the razor clams, which will help remove any remaining sand and loosen the shells for easier cleaning.
Step 3: Blanch the Razor Clams
Using a slotted spoon or tongs, carefully lower the clams into the pot of boiling water. Allow them to blanch for about 10 seconds. Blanching not only cleans the clams but also helps to open the shells, making it easier to remove the meat.
Step 4: Cold Water Bath
Immediately after blanching, transfer the razor clams to a bowl or sink filled with cold tap water. This will shock the clams and stop the cooking process. Leave them in the cold water for a few minutes to cool completely.
Step 5: Remove the Meat
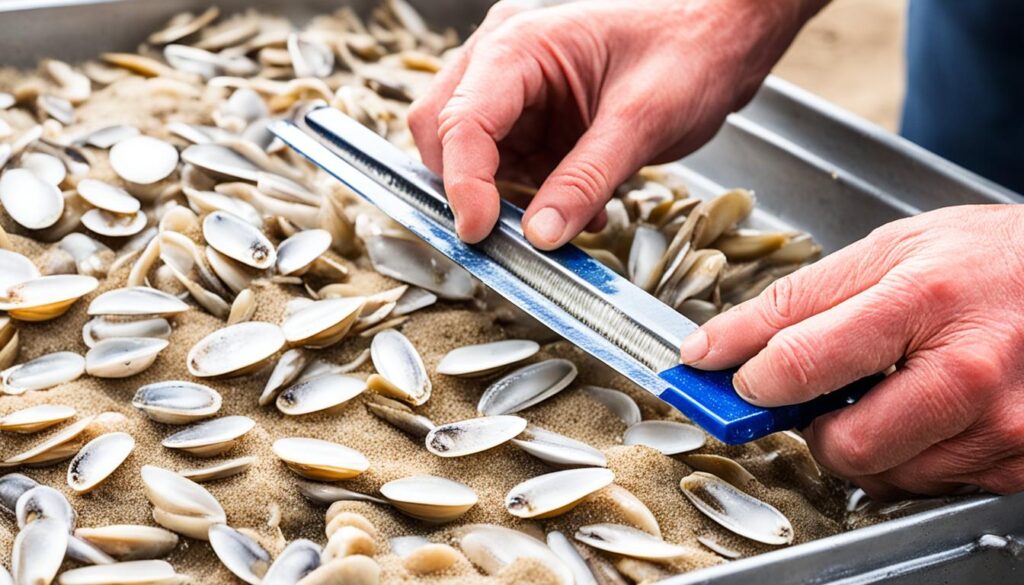
Once the clams are cool, it’s time to remove the meat from the shells. Hold a clam firmly in one hand and, using a knife or clamming tool, carefully separate the shell. Discard any brown parts or digger foot, as they can have a gritty texture and may affect the taste of the clams.
Step 6: Rinse the Siphons
The siphons of the razor clams are tube-like structures used for breathing and filter feeding. Rinse the siphons under cold tap water to ensure they are free from any sand or dirt that may have accumulated during the cleaning process.
Step 7: Ready for Cooking
Now that your razor clams are cleaned and ready to be cooked, you can proceed with your favorite recipe. Whether you’re steaming, frying, or grilling them, the clean and fresh flavor of the clams will shine through.
Remember, proper cleaning is essential to ensure a delightful dining experience with razor clams. By following this step-by-step tutorial, you’ll be able to enjoy the full flavor and texture of these delectable mollusks.

Razor Clam Recipes: Delicious Ways to Enjoy Them
Razor clams are incredibly versatile and can be prepared in various delicious ways. Whether you prefer them steamed, fried, or incorporated into flavorful dishes, there’s a recipe for everyone to enjoy. Here are some mouthwatering razor clam recipes that will tantalize your taste buds:
1. Steamed Razor Clams with Melted Butter
If you want to let the natural flavor of razor clams shine through, steaming is the way to go. This simple preparation method preserves the delicate taste of the clams without overpowering them. Steamed razor clams are best served with melted butter for dipping.
2. Razor Clam and Mushroom Pasta
Combine the savory flavors of razor clams and mushrooms with al dente pasta for a delicious and satisfying meal. The earthy mushrooms complement the mild sweetness of the clams, creating a delightful combination of flavors. Top it off with a sprinkle of grated Parmesan cheese for the perfect finishing touch.
3. Asian-Style Razor Clam Noodles
For an Asian-inspired twist, try making razor clam noodles with ginger, garlic, spinach, and coconut milk. This aromatic dish brings together the vibrant flavors of Southeast Asia and pairs them with the unique taste of razor clams. It’s a perfect fusion of cuisines that will leave your taste buds craving more.
4. Classic Fried Razor Clams
For those who enjoy the crispy texture and rich flavors of fried seafood, classic fried razor clams are a must-try. Dip the clams in a light breading and quickly fry them until they turn golden brown. Serve them with tartar sauce and a squeeze of fresh lemon juice for a delightful seafood experience.
5. Razor Clam Chowder
Warm up on a chilly day with a comforting bowl of razor clam chowder. This hearty soup combines the tender meat of razor clams with creamy potatoes, smoky bacon, and aromatic herbs. Each spoonful is a taste of comfort and satisfaction.
6. Razor Clam Dip
If you’re looking for a crowd-pleasing appetizer, razor clam dip is a fantastic choice. Creamy and flavorful, this dip incorporates minced razor clams, cream cheese, sour cream, and a blend of spices. Serve it with crisp crackers or bread slices for a tasty and indulgent treat.
These recipes offer a variety of delicious ways to enjoy razor clams, showcasing their unique flavor and texture. Whether you prefer them steamed, fried, or in flavorful dishes, razor clams are a versatile ingredient that can elevate any meal.
Remember to always source your razor clams from reputable suppliers or harvest them following local regulations and guidelines. Enjoy the delectable taste of razor clams and share these recipes with family and friends to spread the joy of this delectable seafood delicacy.
Razor Clam Season: Best Times to Harvest
The best time to harvest razor clams depends on the region. In Washington State, for example, the peak season for harvesting razor clams is typically from fall to spring, with low tides occurring during the day or evening. It is important to check the regulations and local guidelines for specific areas, as there may be restrictions on the size of clams and bag limits. Each region may have its own designated season and guidelines.
To help you plan your razor clamming adventures, here is a calendar of razor clam seasons in different regions:
| Region | Season | Low Tide Timing |
|---|---|---|
| Washington State | Fall to Spring | Day or Evening |
| Oregon Coast | October to July | Day or Evening |
| Alaska | May to September | Varies |
| California | November to March | Daytime |
Remember to consult the local fish and wildlife agencies or experienced clam diggers for the most up-to-date information on razor clam seasons in your area. Happy clamming!
Tools and Techniques for Razor Clam Harvesting
When it comes to razor clam harvesting, having the right tools and techniques is essential. Not only will they make the process more efficient, but they also increase your chances of a successful harvest. Here are some important tools and techniques to keep in mind:
1. Clam Gun or Shovel
To dig for razor clams, you’ll need a clam gun or shovel. Both tools work well, but the clam gun is specifically designed for this purpose. It allows you to easily extract the clams without damaging them or the surrounding area.
2. Headlamp
A headlamp is a must-have accessory for nighttime clamming. It provides hands-free lighting, making it easier to spot dimples or other signs of razor clams hiding in the sand. Remember, the best time to harvest razor clams is during low tide.
3. Net Bag or Bucket
A net bag or bucket is essential for storing the harvested razor clams. Make sure it has proper drainage to prevent water buildup, which can lead to spoilage.
Choosing the Best Locations for Clamming
Finding the best locations for razor clamming is crucial to maximize your yield. Look for sandy beaches that have a suitable habitat below the average low-tide mark. These areas should also have a lot of moving water, as razor clams prefer such environments.
Pay attention to the telltale signs in the sand, such as dimples, doughnuts, or keyholes. These indicate the presence of razor clams beneath the surface. Once you spot these signs, dig a few inches seaward of the clam show using your clam gun or shovel.
Remember to be quick and efficient when digging. Avoid turning your back to the ocean and keep an eye out for rogue waves to ensure your safety.
By using the right tools, mastering the proper techniques, and choosing the best locations, you’ll be on your way to a successful razor clam harvest.

Transportation and Storage of Razor Clams
After harvesting razor clams, it is important to transport them correctly to maintain their freshness. The best way to transport razor clams is in a dry, cool spot. They should not be kept in seawater for an extended period as it can lead to an off-taste. Cleaning the clams as soon as possible and keeping the meat refrigerated will help preserve their quality. It is also essential to follow local regulations and size limits when transporting razor clams.
| Transportation and Storage Tips |
|---|
| Transport razor clams in a dry, cool spot. |
| Avoid keeping the clams in seawater for an extended period. |
| Clean the clams as soon as possible after harvesting. |
| Refrigerate the cleaned clams to maintain freshness. |
| Adhere to local regulations and size limits when transporting razor clams. |
Tips for Enjoying Razor Clams
To fully enjoy the flavor and texture of razor clams, it is important to handle them properly. Start by thoroughly cleaning the clams before cooking to remove any sand or dirt. Not only will this enhance the taste, but it will also ensure a pleasant dining experience.
Once cleaned, don’t be afraid to get creative in the kitchen. Experiment with different recipes and cooking techniques to truly savor the versatility of razor clams. Whether you prefer them steamed, fried, or added to pasta dishes, there are countless ways to incorporate these delectable mollusks into your meals.
Steaming:
Steaming razor clams is a simple and popular method that allows their natural flavors to shine. Steam them for about four minutes until the shells open, then serve with a side of melted butter for a truly decadent experience.
Frying:
If you enjoy the crispy texture of fried seafood, try breading and quickly frying razor clams until they turn golden brown. The result is a satisfying combination of briny goodness and delightful crunch.
Pasta Dishes:
Razor clams can be a fantastic addition to pasta dishes. Combine them with fresh mushrooms, garlic, and a splash of white wine for a flavorful seafood linguini. Alternatively, give an Asian twist to your pasta by incorporating razor clams, ginger, garlic, spinach, and creamy coconut milk.
Razor clams offer a mild and slightly sweet flavor, reminiscent of cooked shrimp. Their tender texture adds a delightful element to any dish. As you enjoy the gastronomic wonders of razor clams, don’t forget to share your harvesting and cooking experiences with others. Let’s spread the joy and appreciation for these unique and delicious mollusks.
