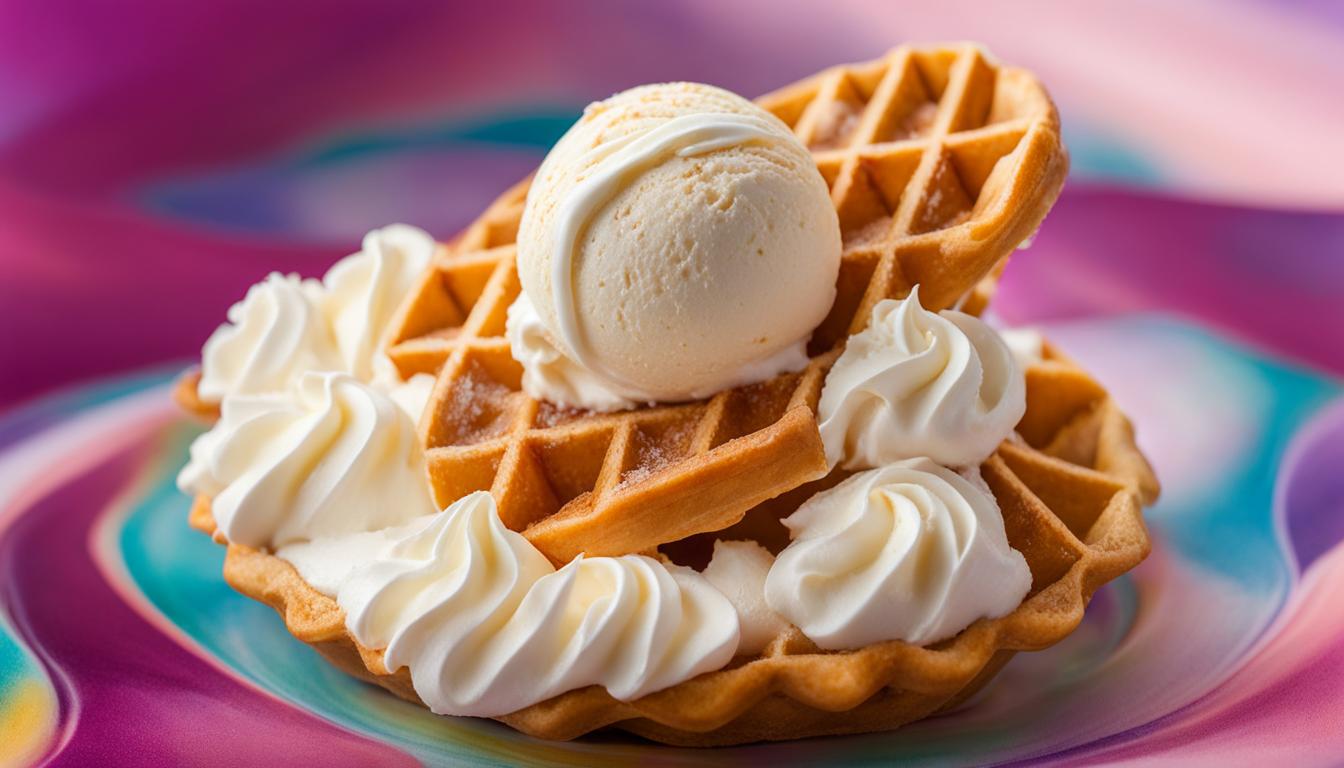
Making homemade ice cream is a delicious and satisfying way to indulge in a sweet frozen treat. But did you know that you can make creamy vanilla ice cream without an ice cream maker? Yes, you heard it right! Our easy no churn recipe requires just three simple ingredients and doesn’t require any special equipment. So, why spend money on store-bought ice cream when you can whip up a batch of creamy goodness right in your own kitchen?
Join us as we uncover the secrets to making no churn vanilla ice cream that rivals any store-bought variety. Discover the benefits of this easy homemade recipe and learn how to unleash your creativity by adding your favorite flavors and mix-ins. Say goodbye to store-bought ice cream and hello to the satisfaction of creating your very own frozen treat. Are you ready to dive into the world of homemade ice cream? Let’s get started!
The Benefits of No Churn Ice Cream
No churn ice cream offers a convenient and delicious way to enjoy homemade frozen treats. With its easy preparation and smooth texture, this no churn recipe has several advantages over traditional churned ice cream.
Accessible to Everyone
One of the key benefits of no churn ice cream is that it eliminates the need for an ice cream maker. This means that even if you don’t own one, you can still whip up a batch of homemade ice cream. It’s a game-changer for those who want to indulge in their favorite icy dessert without investing in extra equipment.
Simple Ingredients, Less Effort
Another advantage of no churn ice cream is its simplicity. You only need a few basic ingredients to get started: sweetened condensed milk, heavy cream, and vanilla extract. This easy ice cream recipe requires minimal effort compared to traditional recipes that involve cooking a custard base and using an ice cream machine. With no churn ice cream, you can have a delicious frozen treat ready in no time.
Smooth and Creamy Texture
No churn ice cream has a smooth and luscious texture that is comparable to churned ice cream. The secret lies in the combination of the sweetened condensed milk and whipped cream. The condensed milk adds richness and creaminess, while the whipped cream creates a light and airy texture. The result is a velvety smooth ice cream that melts in your mouth with each spoonful.
With no churn ice cream, you can enjoy the satisfaction of making homemade ice cream without the hassle. Its accessibility, simplicity, and creamy texture make it a delightful choice for any ice cream lover.
The Simple Ingredients You’ll Need
To make our no churn vanilla ice cream, you’ll only need three simple ingredients: sweetened condensed milk, heavy cream, and vanilla extract. These pantry staples come together to create a creamy and luscious ice cream that will satisfy your sweet tooth.
Sweetened Condensed Milk: This rich and thick milk is made by removing water from cow’s milk and adding sugar to create a sweet and creamy texture. It serves as the foundation of our no churn ice cream, contributing both sweetness and creaminess to the final product.
Heavy Cream: Also known as whipping cream or double cream, heavy cream adds richness and a smooth mouthfeel to the ice cream. It gives our homemade treat a luxurious texture that is sure to impress.
Vanilla Extract: The star of our recipe, vanilla extract infuses the ice cream with its classic and beloved flavor. It adds a subtle sweetness and depth that perfectly complements the creamy base.
These three ingredients can be found in most grocery stores and are readily available. Simply mix them together, and you’ll have a delicious base ready to be frozen into a dreamy homemade ice cream.
Easy Steps to Make No Churn Vanilla Ice Cream
Our no churn vanilla ice cream recipe is incredibly easy to make. All you need are three simple ingredients and a few simple steps to create homemade ice cream that is creamy and delicious. Here’s how:
- Step 1: In a bowl, combine sweetened condensed milk and vanilla extract. Mix until well combined.
- Step 2: In a separate bowl, whip heavy cream until stiff peaks form. This will give the ice cream its fluffy texture.
- Step 3: Gently fold the whipped cream into the condensed milk mixture until fully combined. Be careful not to overmix, as it may deflate the cream.
- Step 4: Pour the mixture into a loaf pan and cover with plastic wrap. This will help prevent ice crystals from forming.
- Step 5: Place the pan in the freezer and let it freeze for at least 4 hours, or preferably overnight, until the ice cream is fully set.
Once the no churn vanilla ice cream is frozen, it’s ready to be enjoyed! Whether you enjoy it on its own, in a cone, or as a base for your favorite toppings, this homemade ice cream is sure to satisfy your sweet tooth.

Adding Flavors and Mix-Ins
One of the great things about homemade ice cream is that you can easily customize it to your liking. Our vanilla ice cream recipe serves as the perfect base for adding different flavors and mix-ins.
You can sprinkle in a handful of add-ins like crushed cookies, chocolate chips, or chopped nuts to create delicious variations. These add-ins provide a delightful texture and burst of flavor with every bite.
For those who prefer a more adventurous flavor profile, you can swap the vanilla extract for other extracts like almond or mint to change up the taste. This simple substitution can create a whole new ice cream experience.
With countless possibilities, you can let your creativity shine and experiment with various combinations. Whether you prefer a classic vanilla with cookie dough chunks or a refreshing mint chocolate chip, the options are endless.
Incorporating Add-Ins:
- Crushed cookies: Whether it’s Oreos, graham crackers, or chocolate chip cookies, adding crushed cookies to your vanilla ice cream brings a delightful crunch and extra burst of flavor.
- Chocolate chips: For all the chocolate lovers out there, sprinkle in some chocolate chips to create a heavenly combination of creamy vanilla and rich chocolate.
- Nuts: Chopped nuts like almonds, walnuts, or pecans add a satisfying crunch and a touch of earthiness to the silky smooth vanilla ice cream.
- Candy pieces: Get creative by adding your favorite candy pieces, like M&M’s or Reese’s, to add a fun and playful twist to your ice cream.
Exploring Flavor Variations:
- Mint chocolate chip: Swap the vanilla extract for mint extract and mix in some chocolate chips to create a refreshing and minty treat.
- Strawberry swirl: Toss in some chunks of fresh strawberries and use a spoon to gently swirl them into the vanilla ice cream base for a fruity and visually appealing dessert.
- Cookie dough: Mix in bite-sized pieces of homemade or store-bought cookie dough to create a classic and irresistible combination that never disappoints.
- Coffee lover’s delight: Add a spoonful of instant coffee granules or a shot of espresso to the vanilla ice cream base for a rich and indulgent coffee-flavored treat.
Remember, the key to creating your perfect ice cream flavor is to experiment and have fun. Feel free to mix and match different add-ins and flavor variations to suit your taste buds. Whether you’re a fan of sweet and crunchy or prefer bold and fruity, homemade ice cream allows you to create endless flavor possibilities.
So go ahead, get creative, and turn your basic vanilla ice cream into a customizable dessert masterpiece that will impress your friends and family.
Storing and Serving Homemade Ice Cream
Once you’ve made your homemade ice cream, it’s important to store it properly to maintain its freshness. Follow these simple steps:
- Transfer the ice cream to a freezer container and label it with the date it was prepared.
- Tightly seal the container to prevent freezer odors and flavors from being absorbed.
- Keep the ice cream towards the back of the freezer, away from the door, to maintain a constant temperature.
When you’re ready to serve the ice cream, follow these tips:
- Allow the ice cream to soften for a few minutes at room temperature before scooping. This will make it easier to serve and ensure a smooth texture.
Properly storing and serving your homemade ice cream will help maintain its deliciousness, ensuring a delightful treat every time.
How Long Does It Last?
When it comes to homemade ice cream, knowing its shelf life and proper freezer storage is essential for maintaining its freshness and flavor. By following a few simple guidelines, you can ensure that your homemade ice cream lasts for several weeks to a few months.
The first step in preserving your homemade ice cream is to protect it from temperature fluctuations and exposure to air. These factors can cause the ice cream to develop ice crystals and lose its creamy texture. To prevent this, cover the surface of the ice cream with plastic wrap before securing the container lid. This extra layer of protection will help maintain its smoothness and prevent the formation of icy crystals.
It’s important to store your homemade ice cream in a flat container rather than a deep one. This allows for even freezing and helps maintain the ice cream’s texture. Additionally, keeping the ice cream towards the back of the freezer, where the temperature is most stable, will further ensure its quality and taste.
Remember that homemade ice cream is best enjoyed when it’s fresh. Although it can last for several weeks to a few months, its texture and flavor may deteriorate over time. We recommend consuming your homemade ice cream within the first few weeks for the best experience.
Tips for Proper Storage:
- Cover the ice cream with plastic wrap before securing the container lid to prevent ice crystal formation.
- Store the ice cream in a flat container instead of a deep one to promote even freezing.
- Keep the ice cream towards the back of the freezer, where the temperature is most stable.
- Consume the ice cream within the first few weeks for optimal flavor and texture.
By following these storage guidelines, you can enjoy your homemade ice cream for an extended period without compromising its quality. So go ahead, indulge in your creations, and savor every delicious scoop of your homemade ice cream!
Other Flavor Variations and Recipes
While our no churn vanilla ice cream is delicious on its own, there are countless other flavor variations and recipes you can try. Experiment with different extracts, fruits, and mix-ins to create unique and tasty combinations. Some popular options include:
1. Chocolate Chip Cookie Dough
Add chunks of edible cookie dough and chocolate chips to your vanilla ice cream base for a sweet and indulgent treat. The creamy vanilla pairs perfectly with the crunchy cookie dough and rich chocolate flavors.
2. Mint Chocolate Chip
Add a few drops of peppermint extract and chopped dark chocolate to your vanilla ice cream to create a refreshing and minty flavor profile. The combination of cool mint and rich chocolate is a classic favorite.
3. Cookies and Cream
Crumble your favorite chocolate sandwich cookies into your vanilla ice cream base for a cookies and cream variation. The smooth vanilla ice cream perfectly balances the chocolatey and crunchy cookie pieces.
4. Strawberry Cheesecake
Fold in fresh strawberry puree and crushed graham crackers into your vanilla ice cream for a delightful strawberry cheesecake flavor. The sweet strawberries and buttery graham crackers add a tangy and creamy twist to your homemade treat.
Don’t be afraid to get creative and have fun with your homemade ice cream creations! The possibilities are endless when it comes to flavor variations and mix-ins. Let your taste buds guide you and enjoy the process of experimenting with different flavors.
Tips for Making Perfect No Churn Ice Cream
Creating delicious homemade ice cream is easier than you think. Here are some tips to ensure your no churn ice cream turns out perfectly every time:
- Start with Cold Ingredients: Before you begin, make sure all your ingredients, especially the sweetened condensed milk and heavy cream, are chilled. This helps the mixture set faster and prevents the formation of ice crystals.
- Choose High-Quality Sweetened Condensed Milk: The quality of your ingredients plays a significant role in the flavor and texture of your ice cream. Opt for a high-quality sweetened condensed milk that is smooth and creamy for the best results.
- Whip the Cream Until Stiff Peaks Form: When whipping the heavy cream, continue beating until stiff peaks form. This ensures that the cream is properly aerated and will result in a light and fluffy final product.
- Be Patient and Allow Proper Freezing Time: It’s essential to be patient and allow the ice cream to freeze for the recommended amount of time. This ensures that it reaches the ideal texture and consistency. Typically, freezing the ice cream for at least 4 hours or overnight yields the best results.
By following these tips, you’ll be able to create perfect no churn ice cream every time. Whether you’re a novice or experienced home cook, these simple tricks will help you achieve a creamy and delicious frozen treat that’s sure to impress.
Enjoy Your Homemade Creation!
Now that you’ve mastered the art of making no churn vanilla ice cream, it’s time to indulge in your homemade creation! Grab a bowl or cone, scoop out your delicious ice cream, and savor every creamy bite. Whether you enjoy it on its own or pair it with your favorite desserts, homemade ice cream is a delightful treat that will impress your family and friends. So sit back, relax, and enjoy the fruits of your labor!

Conclusion
Making no churn vanilla ice cream at home is a simple and rewarding process. With just a few ingredients and easy steps, you can create a creamy and delicious frozen dessert without the need for an ice cream maker. Our easy homemade ice cream recipe allows you to enjoy the sweet satisfaction of homemade ice cream without any hassle.
Whether you prefer the classic vanilla flavor or want to get creative with additional flavors and mix-ins, homemade ice cream offers endless possibilities. You can experiment with different extracts, fruits, and add-ins to create unique combinations that suit your taste. The versatility of homemade ice cream makes it a delightful treat that can be enjoyed anytime, whether it’s a hot summer day or a cozy evening indoors.
So why wait? Gather your ingredients, follow our easy no churn vanilla ice cream recipe, and indulge in the joy of creating your own homemade dessert. Impress your family and friends with this delicious frozen treat that will melt their hearts. There’s nothing quite like the taste of homemade ice cream, and with our recipe, it’s easier than ever to satisfy your sweet tooth.