Have you ever struggled to open an oyster? Fumbled with a knife, fearing a slip-up that could ruin your precious seafood? If so, you’re not alone. Shucking oysters can be a challenging task, but fear not! We’re here to help you master the art of oyster shucking.
But what’s the secret to efficiently and safely shucking an oyster? Is it all about having the right knife skills? You might be surprised to learn that proper knife techniques play a significant role in your success as an oyster shucker. So, are you ready to elevate your oyster shucking game and become a pro? Let’s dive in!
Whether you’re an oyster enthusiast or a novice, this guide will provide you with step-by-step instructions, essential tips, and techniques for shucking oysters like a pro. From understanding different oyster varieties to selecting the right knife and perfecting the shucking technique, we’ll cover it all. Get ready to impress your friends and family with your newfound skills!
Understanding Oysters and Their Varieties
Before diving into the art of shucking oysters, it’s important to understand the nature of oysters themselves. Oysters come in various types, each with its own unique qualities and flavors. Here are some of the most common oyster varieties:
- Pacific oysters
- Kumamoto oysters
- European flat oysters
- Atlantic oysters
- Olympia oysters
Each one of these oyster varieties has a distinct taste profile that can range from briny and salty to sweet and creamy. Exploring different oyster types allows you to experience a diverse range of flavors, giving you the opportunity to find your favorites.
Choosing the right knife is crucial for successful oyster shucking, especially for beginners. The best oyster knife for beginners is one with a short, beveled blade. This type of knife provides better control and precision when removing the oyster from its shell, ensuring a safe and efficient shucking process.
Essential Tools and Preparation
To shuck oysters like a pro, you’ll need the right tools and proper preparation.
First and foremost, you’ll need an oyster knife with a short, sharp, beveled blade. This specialized knife is designed specifically for shucking oysters and is essential for a safe and efficient shucking process. The beveled blade allows you to easily pry open the oyster’s shell and detach the muscle holding the shells together.
It’s also important to protect your hands during the shucking process. Wearing gloves or using a clean kitchen towel can help prevent any accidental slips and protect your hands from any sharp edges. Safety should always be a priority when working with knives.
Before you start shucking, it’s crucial to rinse the fresh oysters under cool water. This not only ensures cleanliness but also helps remove any excess debris or dirt that may be present on the shells. Clean oysters make for a more enjoyable dining experience and reduce the risk of contamination.
By having the right tools and following proper preparation techniques, you’ll be well-equipped to tackle oyster shucking with confidence and ease.
The Oyster Shucking Technique
Mastering the art of shucking oysters requires the right technique and a set of knife skills suited for seafood preparation. With these essential skills, you can unlock the hidden treasures within oyster shells and enjoy the delectable flavors they offer.
Step-by-Step Guide to Oyster Shucking
Follow these steps to shuck oysters like a pro:
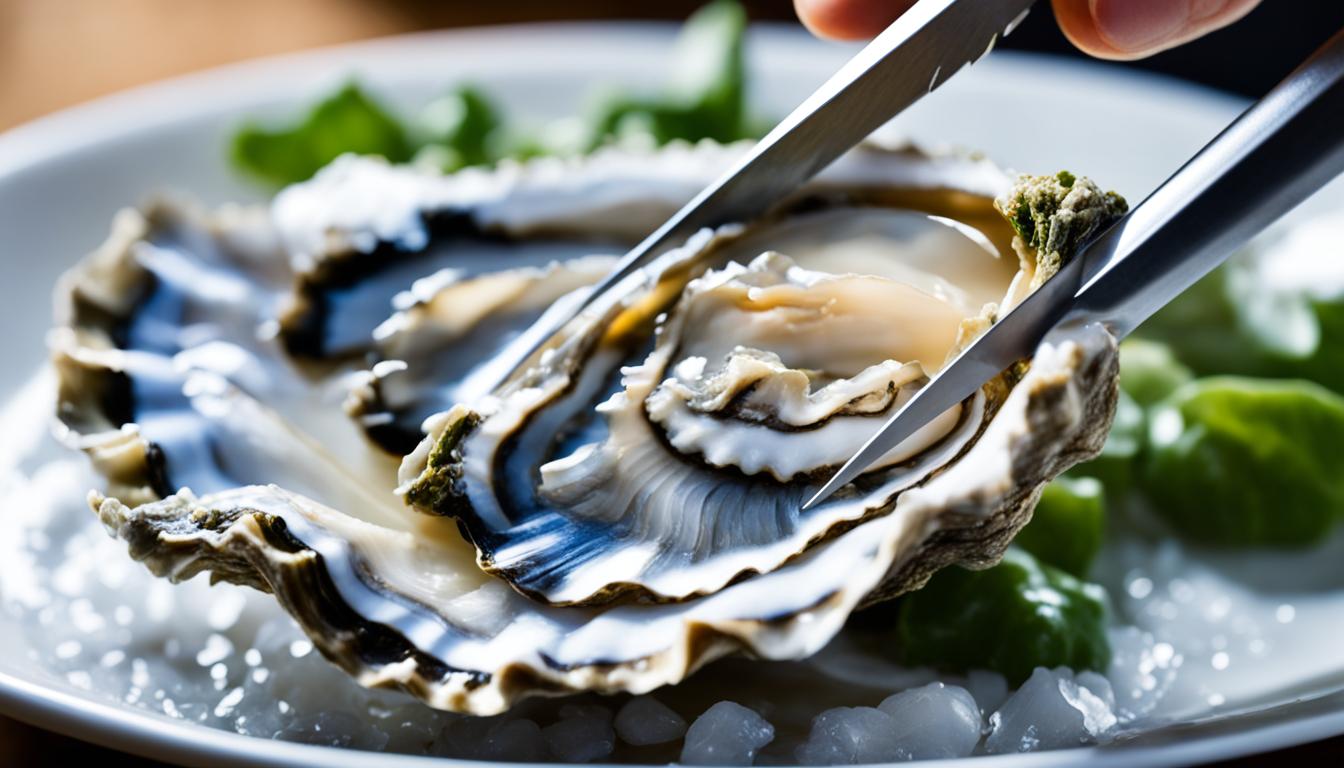
- Start by inserting the oyster knife into the hinge, where the top and bottom shells meet. Apply gentle pressure and wiggle the knife to find the right leverage.
- Once the knife is securely in the hinge, twist it to pry open the oyster shell. This should release the muscle holding the two shells together.
- Run the knife along the upper part of the shell to sever the muscle and detach the top shell from the oyster.
- Carefully remove any shell fragments from the oyster, ensuring a clean and pristine presentation.
- Finally, sever the muscle that connects the oyster to the bottom shell, freeing it completely and leaving you with an open oyster.
Remember to keep the oysters as flat as possible during shucking to retain their flavorful natural juices. Practice is essential to hone your skills and achieve a smooth and efficient shucking technique.
“Shucking oysters is an art that requires both precision and patience. By mastering the proper technique, you can enhance your knife skills for seafood prep and impress your friends and family with deliciously fresh oysters.”
Now that you have the fundamentals of oyster shucking at your fingertips, it’s time to put your newly acquired skills to the test. Practice, learn from each shucking experience, and soon you’ll be shucking oysters with confidence and finesse.
Storing and Freezing Oysters
To keep your oysters fresh and flavorful, proper storage is essential. Follow these tips to ensure your oysters stay fresh for longer:
- Store oysters in a cool place: Place your oysters in a refrigerator or a cooler to keep them cool and maintain their freshness. The ideal temperature for storing oysters is between 32°F to 45°F (0°C to 7°C).
- Avoid letting them sit in water: It’s important to prevent the oysters from sitting in water, as this can lead to a loss of flavor and spoilage. Store them on a tray or a plate lined with a damp cloth or paper towels to absorb excess moisture.
- Use airtight containers: If you plan to freeze your oysters, shuck them first and place them, along with their juice, in airtight containers. This helps to protect them from freezer burn and maintain their quality.
Shucked oysters can be frozen for 3-4 months. However, it is important to note that freezing oysters in their shells is not recommended, as the shells can become brittle and difficult to open after freezing.
Remember, proper storage is key to enjoying fresh and delicious oysters whenever you’re ready to indulge.

“Proper storage is key to enjoying fresh and delicious oysters whenever you’re ready to indulge.”
The Benefits of Eating Oysters
Apart from the culinary experience, oysters offer numerous health benefits. They are rich in omega-3 fatty acids, antioxidants, vitamins (B and D), minerals (especially zinc), and protein. They are also low in fat and can boost the immune system, improve skin health, and strengthen bones. Enjoying oysters is not only a treat for the taste buds but also a nutritious addition to your diet.
Why Oysters are a Healthy Choice
Oysters pack a nutritional punch that can enhance your overall well-being. Here are some key benefits:
- Omega-3 Fatty Acids: Oysters are an excellent source of omega-3 fatty acids, which are essential for brain health, heart health, and reducing inflammation in the body.
- Antioxidants: Oysters are rich in antioxidants, such as vitamin E and selenium, which help protect cells from damage caused by free radicals and promote healthy aging.
- Vitamins and Minerals: Oysters are a good source of vitamins B12 and D, which play a crucial role in energy production, nerve function, and maintaining bone health. They also provide minerals like zinc, iron, and copper, which are essential for various bodily functions.
- Protein: Oysters are a lean source of protein, making them an excellent choice for those looking to increase their protein intake while keeping their fat intake low.
By incorporating oysters into your diet, you can enjoy their delicious taste while reaping the many health benefits they offer.
Delicious Oyster Recipes
Now that you have mastered the art of shucking oysters, it’s time to explore some delicious oyster recipes. Whether you prefer them raw or cooked, there are endless possibilities for incorporating oysters into your meals. Get creative and enjoy the versatility of this delectable seafood.
Oysters Rockefeller
One of the most iconic dishes featuring oysters, Oysters Rockefeller is a classic recipe that is sure to impress. This dish involves topping shucked oysters with a rich mixture of herbs, spinach, breadcrumbs, and butter, before baking them to perfection. The result is a savory and mouthwatering appetizer that is guaranteed to be a hit at any gathering.
Broiled Oysters with Baja-Style Sauce
If you’re looking to add a spicy and tangy twist to your oysters, try broiling them with a zesty Baja-style sauce. This recipe combines the flavors of fresh lime juice, cilantro, jalapenos, garlic, and mayonnaise to create a delicious topping for the oysters. After broiling, the oysters become slightly charred and infused with the vibrant flavors of the sauce.
Roasted Oysters with Bacon and Hot Sauce
If you love the combination of smoky and spicy flavors, then roasted oysters with bacon and hot sauce is the perfect recipe for you. In this dish, shucked oysters are topped with crispy bacon bits and a drizzle of your favorite hot sauce before being roasted to perfection. The result is an irresistible blend of flavors that will leave you craving for more.
Classic Oyster Stew
For a comforting and hearty seafood meal, try making a classic oyster stew. This dish features shucked oysters cooked in a creamy and flavorful broth, along with ingredients like onions, celery, potatoes, and herbs. Serve the stew with crusty bread for a satisfying meal that is perfect for chilly evenings.
Explore these recipes and let your culinary creativity shine with oysters as the star ingredient. Whether you’re hosting a dinner party or simply want to elevate your home-cooked meals, these recipes will surely delight your taste buds and impress your guests.
Tips for Perfect Grilled Oysters
If you’re searching for a unique way to savor oysters, grilling is an excellent choice. The smoky flavor from the grill adds a delicious twist to the traditional preparation. Here are some tips to ensure your grilled oysters turn out perfect:
1. Preheat the grill: Get your grill nice and hot before placing the oysters on it. This will help the shells open evenly and quickly.
2. Place cup side up: Arrange the oysters on the grill with the cup side facing up. This ensures that the flavorful liquids stay inside the shell as they cook.
3. Let them sizzle: Close the grill and let the oysters cook until the top shell opens. This usually takes about 5-10 minutes, depending on the heat of your grill.
4. Enhance the flavor: While grilled oysters are delicious on their own, you can take them to the next level by adding a dollop of butter, a sprinkle of garlic, and some fresh herbs. These additions will infuse the oysters with even more flavor.
Grilled oysters make for an impressive appetizer or main course. The combination of the natural brininess of the oysters and the smokiness from the grill creates a delectable taste that will delight your guests. Give this unique cooking technique a try and elevate your oyster shucking skills.