Are you tired of store-bought Klondike ice cream bars that never quite satisfy your cravings? Do you long for the creamy, chocolatey goodness of a homemade treat? Well, look no further! We have the perfect guide to help you create your own delicious Klondike ice cream bars right in the comfort of your own kitchen.
Imagine sinking your teeth into a velvety ice cream filling, encased in a thin, crispy chocolate shell. Sounds irresistible, doesn’t it? But here’s the twist: you’re the one who made it. No more relying on the mass-produced bars you find in the freezer aisle. With our homemade Klondike ice cream bars recipe, you have full control over the flavors, ingredients, and presentation.
So, are you ready to embark on a culinary adventure and prove that making Klondike ice cream bars at home is not only possible, but also surprisingly easy? Let’s dive in and discover the secret to recreating this beloved treat.
The Secret to a Perfect Klondike Bar Filling
When it comes to creating the perfect Klondike bar, the filling is where the magic happens. And we’re about to let you in on a little secret that will take your homemade Klondike bars to the next level. It all starts with a no-churn ice cream base made using Swiss meringue.
Unlike traditional ice creams that require an ice cream maker, this DIY klondike ice cream bars recipe calls for a simple technique that doesn’t require any special equipment. The Swiss meringue creates a fluffy and stable texture that is reminiscent of the original Klondike bar filling. The smooth and creamy consistency adds to the overall enjoyment of each bite.
To make the no-churn ice cream base, start by whipping up a batch of Swiss meringue. This involves gently cooking sugar and egg whites over a water bath to create a silky, glossy mixture. Once the meringue has cooled, it is folded into whipped cream to create a light and airy filling. The combination of the meringue and whipped cream results in a velvety smooth texture that is simply irresistible.
In addition to the homemade ice cream filling, another key element that sets the Klondike bar apart is its chocolate coating. To achieve that signature chocolate shell, we use refined coconut oil in the chocolate mixture. The coconut oil not only adds a hint of tropical flavor but also gives the coating a glossy finish and a satisfying crispness.
Now that you know the secret to a perfect Klondike bar filling, it’s time to put it into action. Follow our easy homemade Klondike bars recipe and surprise your friends and family with a batch of these delightful frozen treats. They are sure to be impressed by your DIY skills!
Ready to get started? Check out the recipe below:
DIY Klondike Ice Cream Bars Recipe
- Make the Swiss meringue by gently cooking sugar and egg whites over a water bath until the sugar has dissolved and the mixture reaches 160°F. Remove from heat and beat the mixture until stiff peaks form.
- In a separate bowl, whip the cream until soft peaks form. Fold the Swiss meringue into the whipped cream until well combined.
- Pour the mixture into a square cake pan lined with parchment paper and freeze for at least 4 hours, or until firm.
- Once the filling is frozen, cut it into squares using a sharp knife.
- In a microwave-safe bowl, melt chocolate and add refined coconut oil. Stir until smooth and well combined.
- Dip each frozen ice cream square into the melted chocolate mixture, ensuring all sides are coated. Use a spatula and a fork to remove excess chocolate.
- Place the coated bars on a parchment-lined tray and return to the freezer until the chocolate has fully set.
- Enjoy your homemade Klondike ice cream bars anytime!
Now that you have mastered the secret behind a perfect Klondike bar filling, you can experiment with different flavors and variations to create your own unique twists. Get creative with the flavors of the ice cream, add mix-ins to the chocolate coating, or wrap the bars in foil for an authentic look. The possibilities are endless!
Achieving the Fluffy Filling
To achieve the desired light and fluffy filling for your homemade Klondike bars, we recommend making a no-churn ice cream using a combination of whipped cream and Swiss meringue. The Swiss meringue is created by cooking sugar and egg whites over a gentle water bath until the sugar dissolves and the mixture reaches a safe temperature. Once the meringue is cooked, it is whipped until glossy and cooled.
In a separate bowl, the whipped cream is prepared to a soft peak stage. Then, the Swiss meringue is gently folded into the whipped cream until fully incorporated. This combination of whipped cream and Swiss meringue creates a delightful, airy texture that mimics the classic Klondike bar filling.
By following our homemade ice cream bars recipe, you can recreate the nostalgic classic Klondike bars at home. No need to settle for store-bought options when you can have a scrumptious treat made using your own kitchen skills. Let’s move forward and discover the secrets behind crafting the perfect chocolate coating in the next section.
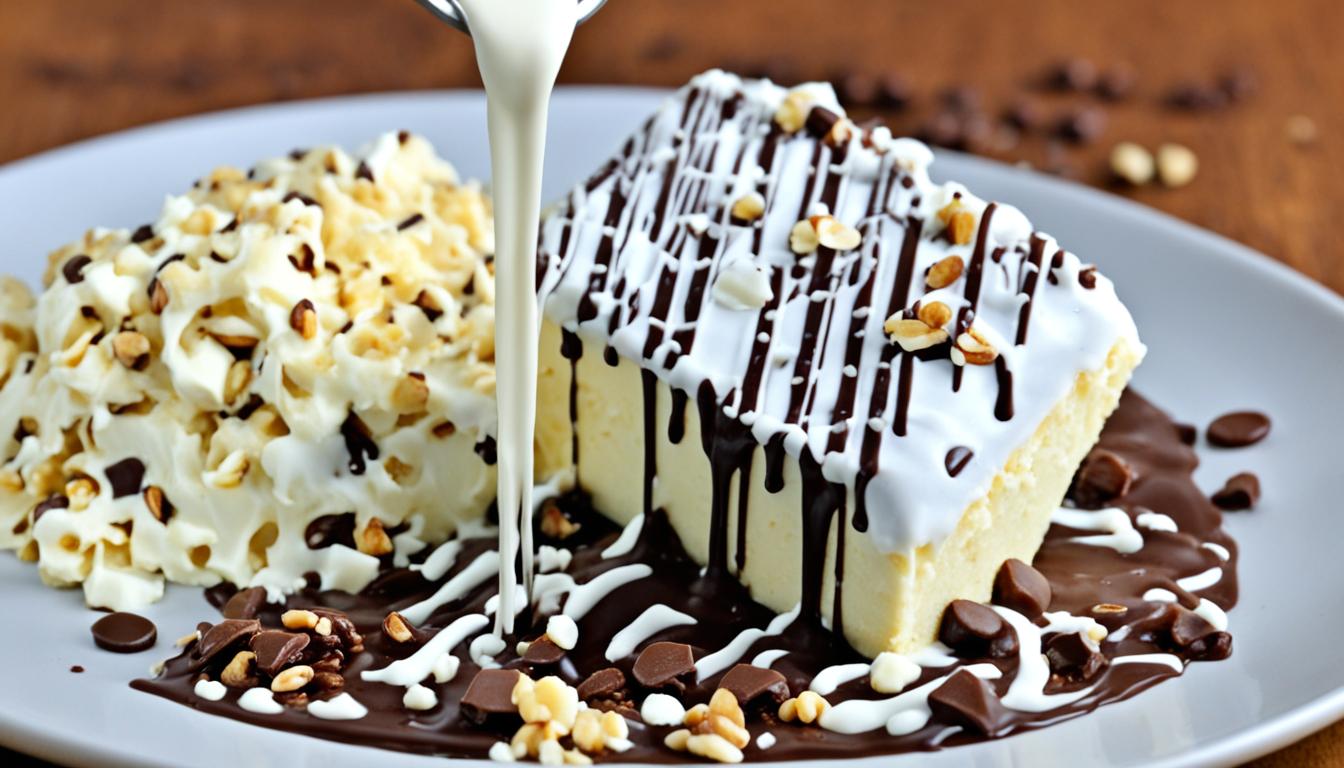
But before that, let’s take a moment to visualize what these delicious homemade Klondike bars look like:
Now, let’s dive into the delightful world of homemade chocolate coatings!
Creating the Chocolate Coating
Now comes the fun part – creating the irresistible chocolate coating for your homemade Klondike bars! The combination of smooth chocolate and refined coconut oil results in a thin and crispy shell that perfectly complements the creamy filling.
To prepare the chocolate coating, you’ll need to melt together equal parts of chocolate and refined coconut oil. The coconut oil helps to achieve a glossy finish and a satisfying crunch when you take a bite.
Pro tip: Choose a high-quality chocolate and opt for semisweet or dark chocolate for a rich flavor. You can also experiment with different types of chocolate to create unique variations of Klondike bars.
Place the chocolate and coconut oil in a heatproof bowl and microwave in short intervals, stirring in between, until fully melted and smooth. Alternatively, you can melt the mixture over a double boiler on the stovetop.
Once the chocolate and coconut oil are well combined, allow the mixture to cool slightly. It is essential to cool it to a specific temperature (around 85°F) before dipping the ice cream bars. This ensures that the coating sets properly and doesn’t melt the frozen filling.
Remember: Patience is key here. Take your time and allow the chocolate mixture to reach the desired temperature before moving on to the next step.
Now that your chocolate coating is ready, it’s time to dip the ice cream bars. Using a spatula and a fork, carefully submerge each square of creamy goodness into the chocolate mixture, making sure it’s fully coated.
Allow any excess chocolate to drip off the bar before placing it on a parchment-lined tray. This step helps to achieve a uniform and even coating on each bar.
Once all the bars are dipped, transfer the tray to the freezer and let them sit until the chocolate coating is firm and fully set. This typically takes about 30 minutes to an hour, depending on your freezer’s temperature.
Now you’re just one step away from enjoying your very own homemade Klondike bars! The final stage is freezing the bars to ensure they are firm and ready to be devoured. But more on that in the next section!
Dipping and Freezing the Bars
Once you have cut your homemade Klondike ice cream bars into squares, it’s time to give them the signature chocolate coating. This step is essential for achieving that classic Klondike bar look and taste!
To start, prepare a smooth and delicious chocolate coating by melting a mixture of chocolate and refined coconut oil. This combination creates a luscious texture and adds a touch of richness to each bite.
Pro Tip: Use a small bowl for the chocolate coating to minimize waste and make the dipping process more efficient.
Now, it’s time to dip! Grab a spatula and a fork to help you with this process. Using the spatula, carefully place a square of the ice cream bar into the melted chocolate mixture.
Gently press down on the top of the bar with the spatula and then use the fork to flip it over, ensuring that all sides are evenly coated.
Allow any excess chocolate coating to drip off the bar before transferring it to a parchment-lined tray. Repeat this process with the remaining bars.
Once all the bars are coated and on the tray, carefully place them back in the freezer. This step is crucial in ensuring that the chocolate coating sets properly and forms a thin, even layer around the creamy filling.
Leave the bars in the freezer for at least a couple of hours, or until the chocolate coating is completely firm and set.
Taste the Perfection
After patiently waiting for the chocolate to set, take out your homemade Klondike ice cream bars from the freezer and indulge in their deliciousness. Each bite will be an explosion of creamy, chocolatey goodness that rivals the store-bought varieties.
You can savor these bars immediately, or for a stronger “klondike” experience, let them sit at room temperature for a few minutes to soften slightly before digging in.
Now that you know the secret to creating Klondike bars with a perfectly dipped and frozen chocolate coating, it’s time to enjoy the fruits of your labor. Share them with friends and family, or keep them all to yourself for whenever that irresistible craving strikes!
Tips for Success
To ensure success with this homemade Klondike bars recipe, there are a few key tips to keep in mind. By following these recommendations, you’ll be well on your way to creating perfect Klondike ice cream bars in the comfort of your own kitchen.
Use the Right Equipment
First and foremost, it’s important to have the right equipment on hand. You’ll need a square cake pan lined with parchment paper for freezing the ice cream. This will help prevent the bars from sticking and make it easier to remove them later. Additionally, using a thick cutting board that can fit in the freezer is crucial for keeping the bars cold during the cutting and dipping process. This will help you maintain the desired shape and texture.
Optimize the Chocolate Coating Process
When it comes to the chocolate coating, efficiency is key. To minimize waste and ensure a smooth dipping process, use the smallest possible bowl that can comfortably fit the bars. This will allow you to fully coat the bars while using the minimum amount of chocolate. By using this technique, you’ll not only save on ingredients but also make the dipping process more efficient overall.
By following these tips, you’ll be well-equipped to successfully recreate the iconic Klondike ice cream bars at home. Whether you’re a seasoned baker or just starting out, this recipe is sure to impress your family and friends. Enjoy the satisfaction of making these delicious treats from scratch and indulge in their creamy, chocolaty goodness.
Flavor Variations and Storage
One of the best things about making DIY Klondike ice cream bars is that you can easily customize them to suit your taste preferences. With a few simple modifications, you can create a variety of delicious flavors that are sure to impress. Here are some ideas to get you started:
- Mint Chocolate Chip: Add a teaspoon of peppermint extract to the ice cream filling and mix in some mini chocolate chips.
- Peanut Butter Crunch: Swirl some creamy peanut butter into the ice cream filling and sprinkle crushed peanuts on top of the chocolate coating.
- Strawberry Shortcake: Mix diced fresh strawberries into the ice cream filling and garnish with crushed graham crackers.
- Cookies and Cream: Fold crushed chocolate sandwich cookies into the ice cream filling and sprinkle some cookie crumbs on top of the chocolate coating.
You can also get creative with the chocolate coating by adding mix-ins or using different types of chocolate. Try adding chopped nuts, sprinkles, or even a drizzle of caramel sauce. The possibilities are endless!
Once you’ve made your homemade Klondike bars, you’ll want to store them properly to keep them fresh. Simply wrap each bar in foil and place them in an airtight container or freezer bag. They can be stored in the freezer for up to a month, but let’s be honest, they’re so delicious that they probably won’t last that long!
Recipe and Nutritional Information
Ready to make your own homemade Klondike ice cream bars? Here’s the complete recipe:
Ingredients:
- 2 cups heavy cream
- 4 large egg whites
- 3/4 cup granulated sugar
- 1/4 cup water
- 1 teaspoon vanilla extract
- 12 ounces semisweet chocolate, chopped
- 1/4 cup refined coconut oil
Instructions:
- In a large mixing bowl, whip the heavy cream until stiff peaks form.
- In a heatproof bowl, combine the egg whites, granulated sugar, and water. Place the bowl over a saucepan of simmering water and whisk constantly until the sugar has dissolved and the mixture reaches 160°F (about 4-5 minutes).
- Remove the egg white mixture from the heat and continue whisking until stiff peaks form and the mixture has cooled to room temperature.
- Gently fold the cooled egg white mixture into the whipped cream until well combined. Stir in the vanilla extract.
- Pour the mixture into a square cake pan lined with parchment paper. Smooth the top with a spatula and freeze for at least 6 hours or overnight.
- Once the ice cream has frozen, lift it out of the pan using the parchment paper. Cut it into individual bars.
- In a microwave-safe bowl, melt the semisweet chocolate and coconut oil together in 30-second intervals, stirring well after each interval, until smooth.
- Line a tray with parchment paper. Using a spatula and fork, dip each ice cream bar into the melted chocolate, allowing the excess to drip off. Place the coated bars on the prepared tray.
- Return the bars to the freezer and freeze until the chocolate is set, about 30 minutes.
Nutritional Information (per serving):
- Calories: 280
- Total Fat: 20g
- Saturated Fat: 13g
- Cholesterol: 49mg
- Sodium: 24mg
- Total Carbohydrate: 26g
- Dietary Fiber: 2g
- Total Sugars: 20g
- Protein: 3g
Now that you have the recipe, you can enjoy these homemade Klondike ice cream bars whenever you want. They’re made with whole ingredients and can be customized to suit your taste preferences. So go ahead, get creative, and indulge in this delightful frozen treat. Happy baking!