Have you ever wondered how to create a lusciously creamy gelato at home? What if we told you that it’s not only possible but also incredibly easy? Forget the store-bought versions that often contain artificial ingredients and whip up this homemade ricotta gelato instead. With just a few simple ingredients and minimal effort, you can indulge in a creamy dessert that will leave you craving for more.
Key Takeaways:
- Create a delectable and creamy gelato at home with an easy ricotta gelato recipe.
- The recipe requires basic ingredients like ricotta, honey, and a simple syrup.
- Enjoy the gelato as a soft serve or freeze it for a firmer texture.
- Elevate the flavor profile by incorporating homemade cannoli cream into the gelato.
- Get creative with serving and topping options, such as berries, roasted fruit, or cacao nibs.
Ingredients and Preparation
Preparing a delicious ricotta gelato at home is easier than you think. With just a handful of simple ingredients, you can create a creamy and satisfying treat that will impress your family and friends. Here’s what you’ll need:
Gelato Ingredients:
- Full-fat ricotta
- Simple syrup
- Honey
- A pinch of salt
Start by combining all the gelato ingredients in a medium bowl. The ricotta provides a rich and creamy base, while the simple syrup adds sweetness and helps to keep the gelato smooth. The honey adds depth of flavor, and a pinch of salt enhances the overall taste.
Once you have all the ingredients in the bowl, it’s time to blend everything together. An immersion blender is perfect for this step, as it ensures a smooth and homogeneous mixture. Blend until all the ingredients are well combined and there are no lumps of ricotta remaining.
After blending, cover the bowl and place it in the refrigerator for a few hours to chill. This step is essential as it allows the flavors to meld together and the mixture to cool down before churning.
Once the gelato base is thoroughly chilled, it’s time to churn it in an ice cream machine. Follow the manufacturer’s instructions to achieve the desired consistency. The churning process incorporates air into the mixture, creating a creamy and smooth gelato texture.
And that’s it! You’re now ready to savor the velvety goodness of homemade ricotta gelato. Whether you choose to enjoy it as a soft serve straight from the churner or freeze it for a firmer texture, you’re in for a delightful treat.
For a visual representation of the steps involved in preparing ricotta gelato, take a look at the diagram below:
Serving and Topping Options
Once you have made the creamy and delicious ricotta gelato, it’s time to think about the best ways to serve and enhance its flavors. Whether you prefer to enjoy it as is or want to add some extra pizzazz, there are plenty of serving suggestions and gelato toppings to explore.
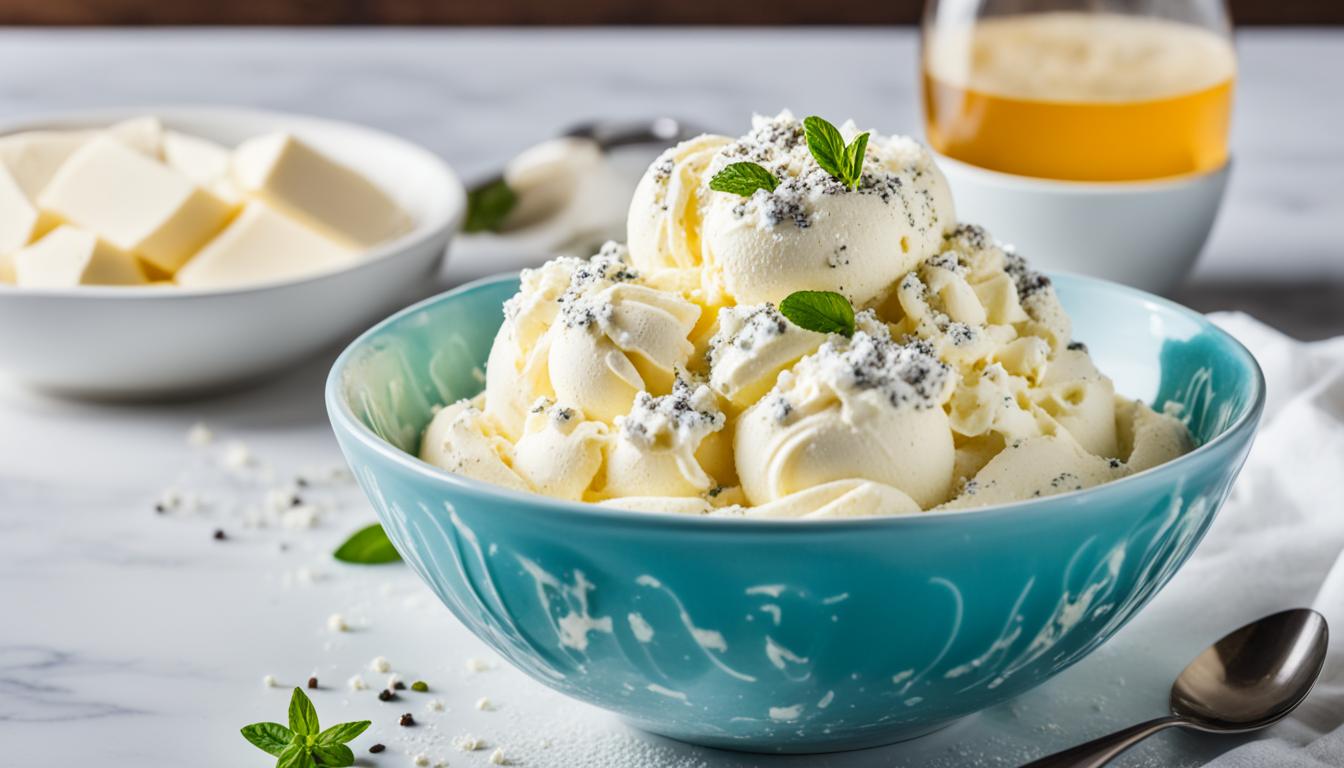
If you can’t wait to dive right in, serving the ricotta gelato immediately after churning is the way to go. Its soft and velvety texture will melt in your mouth, offering an incredibly indulgent experience. To enhance the presentation, you can scoop the gelato into decorative bowls or cone-shaped cups, garnish it with a mint leaf or a sprinkle of powdered sugar, and serve it with a long-handled spoon for that authentic Italian gelato experience.
If you prefer a firmer gelato texture, you can transfer the freshly churned ricotta gelato into a freezer-safe container and let it set in the freezer for a few hours or overnight. This will give the gelato a scoopable consistency and intensify its flavors.
Now, let’s talk about the fun part – gelato toppings! The possibilities are endless. Here are a few ideas to get your creative juices flowing:
- Berries: Fresh strawberries, raspberries, blueberries, or blackberries can add a burst of fruity sweetness to your gelato. You can either layer the gelato with the berries or simply scatter them on top.
- Roasted fruit: Roasting fruits such as peaches, figs, or pineapple can caramelize their natural sugars and intensify their flavors. These juicy and slightly caramelized fruits make a delightful topping for the ricotta gelato.
- Cacao nibs: For chocolate lovers, cacao nibs provide a rich and slightly bitter crunch to contrast with the creamy gelato. Sprinkle a handful of cacao nibs over the gelato for an irresistible texture.
- Tomato jam and olive oil: If you’re feeling daring, try adding a savory twist to your gelato with some tomato jam and a drizzle of extra virgin olive oil. This unexpected combination creates a unique flavor profile that will surprise and delight your taste buds.
Feel free to mix and match toppings or even create your own unique combinations. The key is to experiment and have fun with your gelato creations. Let your imagination run wild!
Image: A colorful assortment of gelato toppings, including berries, cacao nibs, and roasted fruit.
Homemade Ricotta Cheese
Making your own ricotta cheese is a great way to ensure quality and freshness in the gelato recipe. By following a simple process and using just a few ingredients, you can create homemade ricotta cheese that is far superior to store-bought options. Here’s how:
- Heat whole milk and cream in a saucepan over medium heat, stirring occasionally to prevent scorching. Heat the mixture until it reaches a temperature of around 185°F (85°C). This step helps to denature the proteins in the milk, which will aid in the formation of curds.
- Add salt and lemon juice to the heated milk and cream mixture, stirring gently to combine. The acid from the lemon juice will cause the milk to curdle, separating it into curds and whey.
- Allow the mixture to sit undisturbed for about 10 minutes to allow the curds to fully form.
- Next, line a colander or fine-mesh sieve with cheesecloth or a clean, lint-free kitchen towel. Place the colander or sieve over a large bowl to catch the whey that will drain off.
- Gently pour the curdled mixture into the lined colander or sieve, allowing the whey to drain off. The longer you let it drain, the drier the ricotta cheese will become. For a smoother, creamier texture, you can stop draining when the desired consistency is reached.
- Transfer the strained ricotta cheese to an airtight container and refrigerate until needed. It can be used immediately, or stored in the refrigerator for up to a week.
Homemade ricotta cheese adds a rich, creamy flavor to the gelato recipe and enhances its overall quality. You can also use the ricotta cheese in various other dishes, such as pastas, salads, and desserts. The possibilities are endless!
Now that you know how to make your own ricotta cheese, let’s explore how to incorporate it into a delicious homemade ricotta gelato in the next section.

How to Make Cannoli Cream
Cannoli cream is a versatile and delicious Italian dessert filling that can elevate the flavor of many recipes, including gelato. With a few simple ingredients, you can create a creamy and decadent homemade cannoli cream that will impress your family and friends.
Ingredients:
- Whipping cream – 1 cup
- Strained ricotta cheese – 1 cup
- Powdered sugar – 1/2 cup
- Vanilla extract – 1 teaspoon
- Ground cinnamon – 1/2 teaspoon
- Mini dark chocolate chips – 1/4 cup
To begin, gather all the necessary ingredients for your homemade cannoli cream. Make sure to strain the ricotta cheese to remove any excess liquid and ensure a smooth and creamy texture.
In a mixing bowl, combine the whipping cream, strained ricotta cheese, powdered sugar, vanilla extract, ground cinnamon, and mini dark chocolate chips. Use a whisk or an electric mixer on low speed to gently blend the ingredients together.
Tip: For a more pronounced cinnamon flavor, you can add a pinch of nutmeg or cloves to the mixture.
Continue mixing until all the ingredients are well combined and the mixture has a creamy consistency. Be careful not to overmix, as this can lead to a grainy texture.
Once the cannoli cream is thoroughly mixed, cover the bowl with plastic wrap or transfer it to an airtight container. Refrigerate the cream for at least 1 hour to allow the flavors to meld and the cream to set.
After chilling, your homemade cannoli cream is ready to use as a filling for various desserts, including gelato. Its creamy texture and delightful combination of flavors will add a decadent touch to any recipe.
Enjoy the rich and creamy goodness of homemade cannoli cream in your gelato or other desserts. Experiment with different variations by adding chopped pistachios, grated orange peel, or additional spices for a personalized touch.
Filling and Storage Tips for Cannoli Shells
When it comes to cannoli, the filling is just as important as the shell. To achieve the perfect cannoli, you need to know how to fill and store the shells properly. In this section, we’ll share some tips to help you achieve cannoli perfection.
Filling the Cannoli Shells
To fill your cannoli shells, you’ll need a pastry bag with a coupler. This allows you to easily pipe the cannoli cream into the shells without making a mess. It’s important to use a pastry bag with a coupler, as a regular pastry bag may clog or burst under pressure.
Additionally, we recommend using mini chocolate chips in your cannoli cream. These smaller chips will not clog the tip of the pastry bag, ensuring a smooth filling process. The mini chocolate chips also add a delightful texture to each bite of your cannoli.
Homemade or Commercial Cannoli Shells?
When it comes to the cannoli shells themselves, you have two options: homemade or commercial. Homemade cannoli shells are a labor of love, requiring time and patience to achieve the perfect crispy texture. If you’re feeling adventurous, making your own shells can be a rewarding experience.
However, if you’re short on time or prefer convenience, commercially made cannoli shells are readily available at many grocery stores and specialty shops. These pre-made shells are a convenient option that can save you time in the kitchen.
Storage Tips for Filled Cannoli Shells
Once your cannoli shells are filled, it’s important to store them properly to maintain their freshness and texture. We recommend storing the filled shells in an airtight container in the refrigerator.
Cannoli Shell Storage Tips:
- Place the filled cannoli shells in a single layer in an airtight container.
- Seal the container tightly to prevent any air from entering.
- Store in the refrigerator for up to two days.
| Filled Cannoli Shells Storage Tips | Duration |
|---|---|
| Refrigerated in an airtight container | Up to 2 days |
By following these storage tips, you can enjoy your cannoli shells for up to two days without compromising their taste and texture. Remember to keep them refrigerated and in an airtight container to maintain their freshness.
Variations and Serving Suggestions
There are endless possibilities when it comes to customizing cannoli cream. By adding various ingredients, you can create unique flavors and textures that will delight your taste buds. Here are some ideas to inspire your culinary creativity:
Variations:
- Chocolate Shavings: For a rich and indulgent twist, add a generous amount of chocolate shavings to the cannoli cream. The creamy texture of the filling paired with the satisfying crunch of the chocolate creates a delightful contrast.
- Chopped Pistachios: For a nutty and crunchy addition, sprinkle some finely chopped pistachios into the cannoli cream. The pistachios add a hint of saltiness and a burst of flavor with every bite.
- Grated Orange Peel: Add a refreshing citrusy twist by grating some fresh orange peel into the cannoli cream. The bright and zesty flavors complement the creamy sweetness of the filling.
Serving Suggestions:
The cannoli cream can be enjoyed in more ways than just filling cannoli shells. Here are some creative serving ideas:
- Serve the cannoli cream as a delicious dip for fresh fruit such as strawberries, pineapple, or apple slices. The creamy sweetness pairs perfectly with the natural sweetness of the fruits.
- Create a cannoli cream parfait by layering the filling with crushed cannoli shells and fresh berries in a glass. Top it off with a dollop of whipped cream for an extra indulgent treat.
- Use the cannoli cream as a filling for crepes or pancakes. Spoon a generous amount between each layer for a delightful and decadent breakfast or dessert.
- Transform the cannoli cream into an ice cream flavor by incorporating it into a homemade base. Churn it in an ice cream maker for a creamy and dreamy frozen treat.
- Spread the cannoli cream onto freshly baked cookies, top with another cookie to create a sandwich, and dust with powdered sugar. These cannoli cream-filled cookies are perfect for sharing and enjoying with a cup of coffee.
With these variations and serving suggestions, you can take your cannoli cream to the next level and impress your friends and family with your culinary skills. Get creative, experiment, and enjoy the versatility of this delightful Italian dessert!
Conclusion
Making an easy ricotta gelato at home is a simple and rewarding experience. With just a few ingredients and basic preparation steps, you can enjoy a delicious and creamy homemade treat. The combination of creamy ricotta, honey, and simple syrup creates a luscious gelato that will satisfy your sweet cravings.
What sets this gelato apart is the incorporation of homemade cannoli cream. This rich and flavorful filling adds a touch of authenticity and elevates the taste to a whole new level. Whether you choose to enjoy the gelato as a soft serve or freeze it for a firmer texture, the flavors will blend perfectly, leaving you wanting more.
To make the gelato truly your own, get creative with toppings and serving suggestions. Try adding fresh berries or roasted fruit for a burst of freshness. For a delightful crunch, sprinkle some cacao nibs over the gelato. Or if you’re feeling adventurous, drizzle it with tomato jam and a swirl of olive oil for a unique twist.
In conclusion, indulging in a homemade ricotta gelato with cannoli cream is a delightful experience that will transport your taste buds to Italy. Enjoy the creamy bliss and take pride in creating a dessert that is sure to impress family and friends alike.