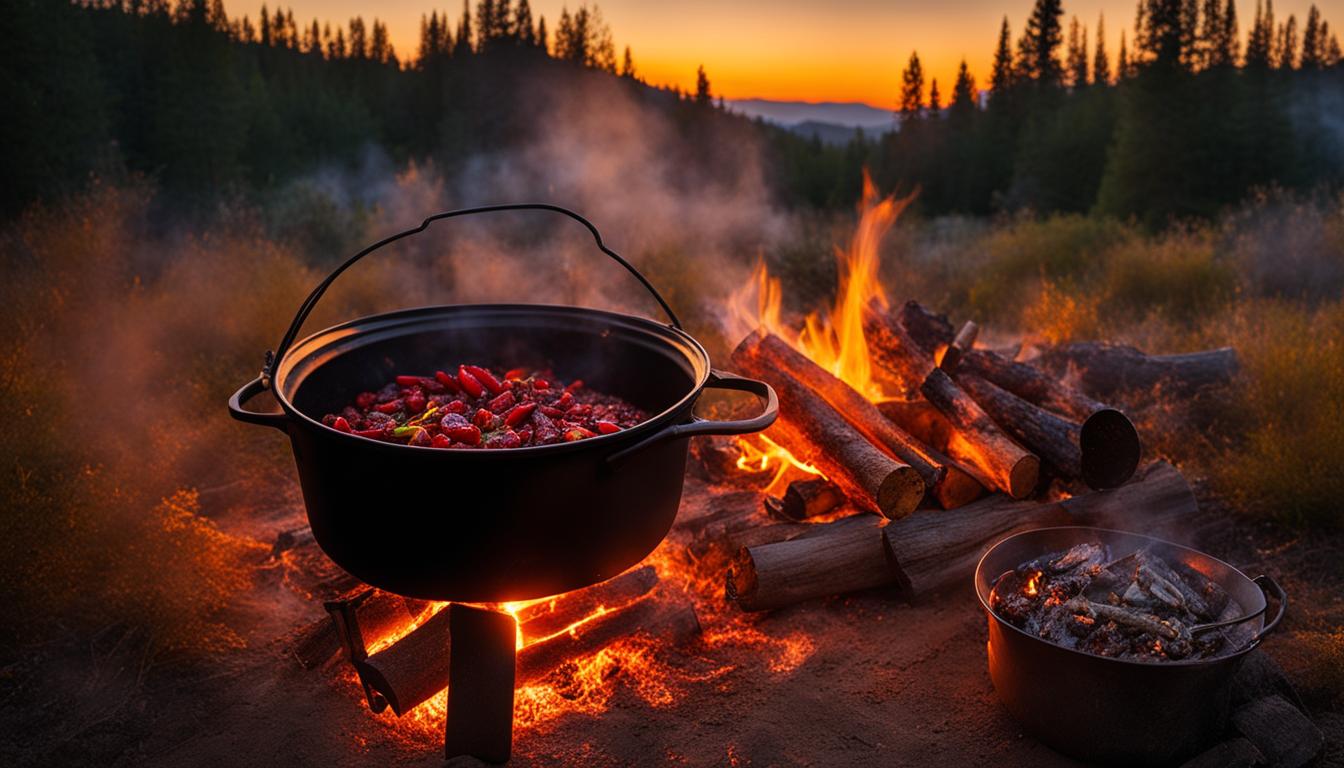
Are you ready for a flavor-packed camping adventure? We have an enticing recipe that will take your campfire cooking to the next level. Get ready to indulge in the mouthwatering aroma of our campfire chili in a Dutch oven. It’s the perfect way to warm your soul on those crisp autumn nights.
Picture this: tender chunks of beef and Italian sausage simmering in a rich and hearty sauce, infused with the smoky flavors of the campfire. This campfire chili recipe is a crowd-pleaser that will satisfy even the most discerning taste buds.
But here’s the twist: we’ve added a surprising ingredient that will elevate the flavors to new heights. Can you guess what it is? Hint: it’s not your typical chili ingredient. Its subtle sweetness and gentle spiciness will leave you craving for more.
So, get your Dutch oven ready, gather around the campfire, and let’s dive into this culinary adventure. Get ready for a rustic feast that will warm your heart and satisfy your cravings!
Tips for Cooking Campfire Chili
When it comes to cooking campfire chili in a Dutch oven, we have some handy tips to ensure a delicious and hassle-free experience. Follow these tips for a successful campfire cooking adventure:
- Preheat the Dutch oven: Before you start cooking, heat the Dutch oven over the fire for about 15 minutes. This preheating process helps distribute the heat evenly and ensures that the chili cooks thoroughly.
- Season the Dutch oven: To prevent sticking or burning, season the Dutch oven with butter. This simple step will make cleanup much easier and enhance the flavors of your chili.
- Simmer the spices: Once the Dutch oven is hot, add the red bell pepper, red onion, jalapeno, chili powder, ground cumin, pumpkin pie spice, dried oregano, and garlic. Let the spices simmer for 5 minutes, allowing their flavors to blend together.
- Cook the meat: Add the ground beef and sausage to the Dutch oven and cook until browned, breaking it down with a wooden spoon or spatula. This step ensures that the meat is fully cooked and adds a depth of flavor to your chili.
- Add the beans, tomatoes, and beer: Once the meat is cooked, it’s time to add the kidney beans, black beans, diced tomatoes, tomato paste, and beer. These ingredients provide the heartiness and richness that make chili so satisfying.
- Simmer over the fire: Let the chili simmer over the fire for 1 to 1.5 hours, stirring occasionally to prevent sticking. This slow cooking process allows the flavors to develop and intensify, resulting in a flavorful and comforting chili.
- Serve with your favorite toppings: Once the chili is cooked to perfection, serve it with your favorite toppings such as shredded cheese, sour cream, chopped onions, or fresh cilantro. These additions add an extra layer of texture and flavor to your campfire chili.
With these handy tips, you’ll be able to create a hearty and delicious campfire chili using your trusty Dutch oven. Enjoy the warmth and flavors of campfire cooking on your next outdoor adventure!
Beer Chili in a Dutch Oven Recipe
Take your campfire cooking to the next level with this flavorful beer chili recipe. We start by browning thick-sliced bacon in a Dutch oven over medium heat. The sizzling bacon fills the air with an enticing aroma, setting the stage for a delicious chili feast. Next, we add the onions and ground meat—whether you prefer venison, beef, chorizo, or a combination—and let them cook until browned. The rich flavors meld together beautifully, creating a savory foundation for our chili.
Now comes the time to add the remaining ingredients that will make this chili truly special. We include garlic, tomatoes, ground cumin, paprika, roasted poblano peppers, beef stock, and of course, beer. The beer brings a unique depth of flavor that complements the other ingredients perfectly. Whether you choose a light lager or a darker ale, the beer adds a subtle richness that takes this chili to the next level.
Once all the ingredients are added, we let the chili simmer for several hours. This slow-cooking process allows the flavors to intensify and blend together harmoniously. As the chili bubbles away in the Dutch oven, the enticing aroma fills the air, creating a mouthwatering anticipation.
When the chili is finally ready, serve it piping hot with your favorite garnishes. Whether you prefer shredded cheese, sour cream, diced onions, or a sprinkling of fresh cilantro, these toppings add a touch of freshness and creaminess to each spoonful.
So, gather around the campfire and dig into a bowl of this beer chili in a Dutch oven. The hearty meat, robust seasonings, and the rich beer-infused broth will warm your soul and satisfy your taste buds. It’s a perfect dish for chilly evenings spent enjoying the outdoors.
Deer Camp Chili Recipe
If you’re looking for a hearty and flavorful chili recipe to serve at your next hunting camp or party, this deer camp chili recipe is perfect. It combines tender round steak, savory bacon, and a blend of spices to create a mouthwatering dish that will satisfy everyone’s taste buds.
To start, gather 7 to 8 pounds of round steak and cut it into bite-sized pieces, around 1 inch in size. Additionally, chop 1 pound of thick-sliced bacon to add a smoky flavor to the chili.
Next, dice a generous amount of onions and set them aside. In a Dutch oven, brown the chopped bacon until crispy. Once done, remove the bacon from the pot and set it aside for later use.
In the same pot, add the diced onions and sauté until they become translucent and fragrant. This will enhance the overall flavor profile of the chili.
Now, it’s time to prepare the meat. Season the round steak pieces with kosher salt, black pepper, and minced garlic. Brown the seasoned meat in the Dutch oven until it’s nicely seared on all sides, ensuring maximum flavor development.
Once the meat is cooked, add the tomatoes, ground cumin, paprika, and roasted poblano peppers to the pot. These ingredients will infuse the chili with a rich and smoky taste.
Pour in the beef stock and add water as needed to achieve the desired consistency for your chili. Cover the Dutch oven and let the chili simmer on low heat for 2 to 2.5 hours. Stir occasionally to prevent sticking and ensure even cooking.
While the chili is simmering, take a moment to appreciate the rustic cooking process. Imagine yourself gathered around the campfire with friends, the aroma of the chili filling the air.
After the simmering time is up, check the tenderness of the meat. If it’s fork-tender and the flavors have melded together, your deer camp chili is ready to be served.
To enhance the presentation and flavor, serve the chili in bowls alongside toppings such as shredded cheddar cheese, chopped cilantro, and a dollop of sour cream. These additional components will elevate the taste and texture of the dish.
Now, enjoy every spoonful of this hearty and delicious deer camp chili. Share it with your fellow hunters or enjoy it at home while reminiscing about your outdoor adventures.
Freezing Chili for Later
Chili is a versatile and delicious dish that can be enjoyed as a hearty meal. Whether you’re making a large batch of chili or have leftovers, freezing is a great way to preserve this flavorful dish for later.
When it comes to freezing chili, you have a few options. One popular method is using mason jars, which are perfect for individual servings. Alternatively, you can use freezer bags for larger portions. Whichever method you choose, make sure to fill the jars or bags about three-fourths full to allow room for expansion as the chili freezes.
If you opt for freezer bags, a handy tip is to lay them flat in the freezer. This not only saves space but also allows for easier stacking and organization.
Now, you may wonder why freezing chili is beneficial. Besides providing a convenient meal for later, freezing actually amplifies the flavors of the chili, making it even more delicious when thawed and reheated.
When you’re ready to enjoy your frozen chili, simply remove it from the freezer and allow it to thaw in the refrigerator overnight. Once thawed, you can heat it on the stovetop or in the microwave, and it will be ready to serve.
Remember to label your frozen chili with the date, so you know how long it has been stored. While frozen chili can last for up to three months, it’s best to consume it within one to two months to maintain optimal flavor and quality.
So, whether you’re stocking up on chili for busy weeknights, or simply want to have a delicious meal on hand whenever the craving strikes, freezing chili is a practical and flavorful solution.
Conclusion
Campfire chili cooked in a Dutch oven is the ultimate rustic feast. Whether you’re adding pumpkin spice for a sweet and spicy twist or incorporating beer for extra flavor, these recipes are sure to satisfy your taste buds. The hearty deer camp chili is perfect for outdoor adventures or cozy gatherings under the stars. And don’t forget, freezing some chili for later is a convenient and delicious option to enjoy the warmth and flavor of campfire chili whenever you desire.
Summary of campfire chili: Campfire chili is a versatile and flavorful dish that can be cooked over a campfire in a Dutch oven. From traditional recipes to those with unique twists, such as pumpkin spice or beer, there are endless possibilities to suit your palate. The rich and smoky flavors of campfire chili make it the perfect meal for outdoor adventures or cozy gatherings with family and friends. And with the option to freeze leftovers, you can enjoy this delicious dish whenever you crave its warmth and flavor.
Final thoughts on Dutch oven chili: Cooking chili in a Dutch oven adds an extra layer of rustic charm and enhances the flavors of the dish. The slow and steady cooking process allows the ingredients to meld together, creating a rich and hearty chili that is perfect for any occasion. So grab your Dutch oven, gather around the campfire, and indulge in the satisfying taste of campfire chili.