Do you ever wonder what makes the perfect apple pie? Is it the type of apple used, the pie crust, or the baking techniques? The Food Lab has done the research and experimentation to uncover the secrets to creating the ultimate apple pie. So, what are the best apples for apple pies? Let’s find out!
Whether you’re an experienced baker or just starting out, this guide will provide you with valuable insights on selecting the right apples, preparing the perfect pie crust, and mastering the art of pie-making. From delicious apple varieties to expert tips and tricks, we’ll help you create a homemade apple pie that will have everyone asking for seconds.
The Science of Pie Crust
The key to a perfect pie crust lies in understanding the relationships between flour and butter. In their quest to develop the ideal crust, The Food Lab discovered a technique that results in a buttery flaky crust that is tender and easy to work with.
The process starts by incorporating flour and butter until a paste forms. This creates a smooth and malleable dough that bakes up crisp and tender. To achieve this, The Food Lab suggests cutting in more dry flour after the initial incorporation. This step helps prevent the crust from cracking or falling apart during the rolling process.
A beautifully baked pie starts with the right crust. The buttery flaky crust created by The Food Lab’s method enhances the overall pie experience by providing a delightful textural contrast to the filling. With each bite, you’ll enjoy the perfect balance between flakiness and tenderness.
Preparing the Perfect Pie Crust
- Combine flour and butter until a paste forms.
- Cut in more dry flour to create a smooth and malleable dough.
- Roll out the dough evenly and carefully transfer it to the pie dish.
- Crimp the edges of the crust for a decorative touch.
- Chill the crust before filling and baking.
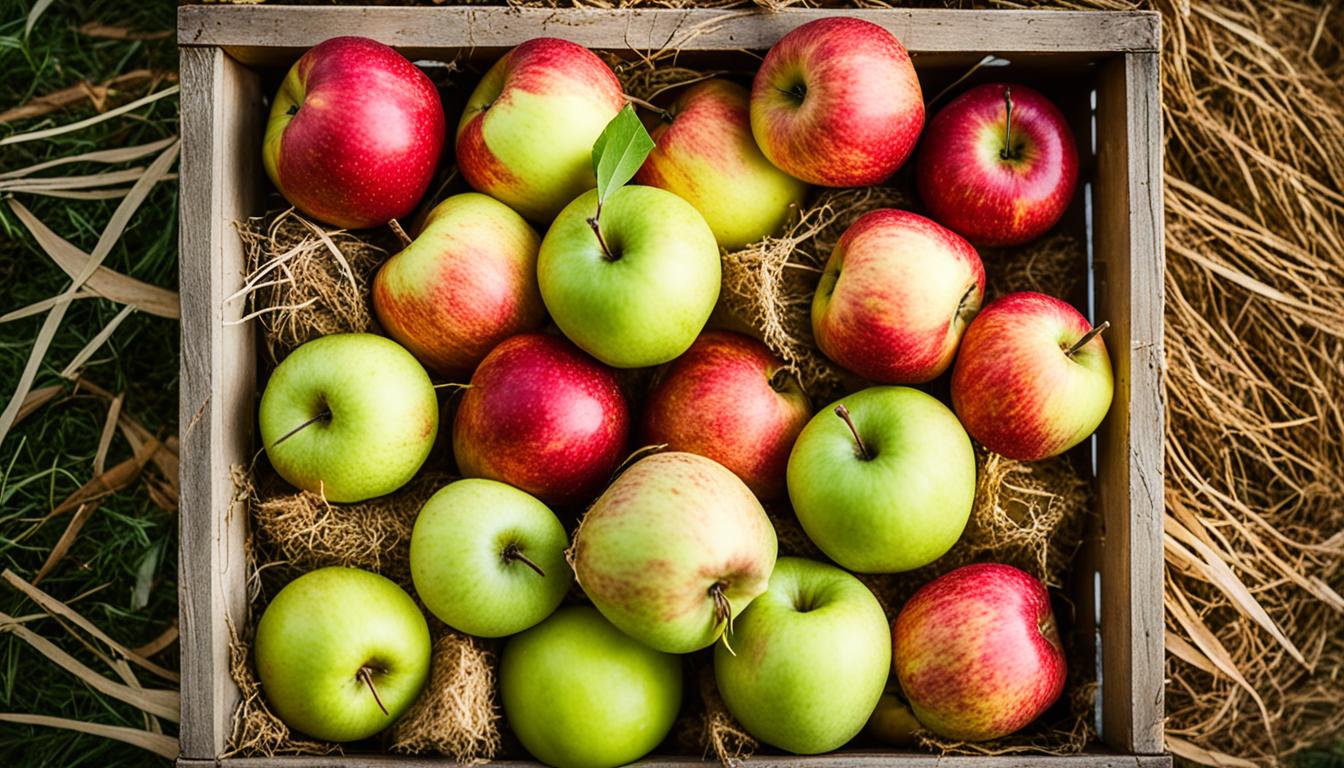
Selecting the Right Apple
The key to a delicious apple pie lies in selecting the right apple variety. The Food Lab’s research has found that acidity plays a crucial role in determining the ideal apple for pie-making.
Apples with higher tartness have firmer flesh, as the acid strengthens the pectin, which holds the cells of the fruit together. This results in tender apple chunks that hold their shape even after baking.
After testing various apple varieties, The Food Lab has found that Golden Delicious apples strike the perfect balance between tartness and flavor. Their slightly tart and sweet profile enhances the overall taste of the pie.
Why Golden Delicious?
Golden Delicious apples are favored for their appealing texture and mild acidity. They have a crisp bite that complements the tender nature of the apple chunks in the pie. Their unique flavor profile adds a delightful sweetness to the pie filling without overpowering the other ingredients.
These apples are known for their bright yellow or golden skin, making them visually appealing in a classic apple pie. Their flesh is creamy-white, which contrasts beautifully with the warm tones of the pie filling.
The Importance of Acidity
In addition to their firmness and flavor, the acidity in Golden Delicious apples also plays another important role. The acid helps balance the sweetness of the pie filling, preventing it from becoming overly sugary.
Moreover, the perfect acidity in these apples ensures that the pie filling sets properly, resulting in a smooth texture and avoiding excessive liquid in the pie.
So, when it comes to selecting apples for your apple pie, tart varieties like Golden Delicious are the way to go. Their firmness, flavor, and balanced acidity make them the top choice for creating the perfect homemade apple pie.
Preparing the Apples
When it comes to creating a delicious apple pie, preparing the apples is a crucial step. The Food Lab recommends a technique called par-cooking, which involves briefly cooking the apple slices before baking them in the pie.
To par-cook the apples, start by slicing them into thin, even slices. Then, pour boiling water over the sliced apples and let them rest for 10 minutes. This process allows the enzymes in the apples to convert the pectin into a more heat-stable form, which helps the apples retain their shape and texture during baking.
After par-cooking, drain the apples and gently pat them dry. They are now ready to be used as filling for your apple pie. The par-cooking process ensures that the apples won’t turn too soft or mushy during baking, resulting in a pie with perfectly tender apple chunks.
By investing a little extra time in preparing the apples, you’ll ensure that your apple pie filling is just right. So don’t skip this crucial step and enjoy a pie with the perfect balance of flavors and textures.
Pie Filling Tips:
- Always use high-quality apples that are firm and ripe.
- Choose apple varieties such as Golden Delicious or Granny Smith, which maintain their shape and provide a good balance of sweetness and tartness.
- Consider adding spices like cinnamon or nutmeg to enhance the flavor of the apple filling.
- When mixing the apple slices with sugar and spices, use cornstarch as a thickening agent to help bind the filling together.
- Avoid using apples that are too juicy or watery, as they can result in a soggy pie crust.
By following these tips and par-cooking your apple slices, you’ll be well on your way to creating a delicious apple pie with a perfectly balanced and flavorful filling.
The Perfect Apple Pie Recipe
When it comes to apple pie, The Food Lab has perfected a recipe that will leave you craving for more. Prepare to indulge in this classic apple pie that combines the flakiness of their signature buttery crust with the perfect blend of Golden Delicious apples. This homemade apple pie is sure to become a family favorite.
To start, you’ll need to make The Food Lab’s buttery flaky pie crust. This crust is the foundation of a perfect pie, providing a delicate and crisp texture that beautifully complements the sweet apple filling.
Ingredients:
- 2 ½ cups all-purpose flour
- 1 teaspoon salt
- 1 tablespoon sugar
- 1 cup unsalted butter, cold and cubed
- ½ cup ice water
To make the crust, combine the flour, salt, and sugar in a bowl. Add the cold, cubed butter and use a pastry cutter or your fingertips to mix until the mixture resembles coarse crumbs. Slowly drizzle in the ice water while mixing until the dough comes together. Divide the dough in half, shape into disks, and refrigerate for at least 1 hour.
Filling:
- 6-8 Golden Delicious apples, peeled, cored, and thinly sliced
- ¾ cup granulated sugar
- 2 tablespoons cornstarch
- 1 teaspoon ground cinnamon
For the filling, pre-cook the apple slices by pouring boiling water over them and letting them rest for 10 minutes. Drain the apples and pat them dry. In a large bowl, combine the apples with the sugar, cornstarch, and cinnamon, tossing until the apples are evenly coated.
Roll out one disk of the chilled pie crust and fit it into a 9-inch pie dish. Pour the apple filling into the crust and spread it out evenly. Roll out the second disk of crust and place it over the filling. Trim any excess crust and seal the edges by crimping them together with a fork or your fingers.
Preheat your oven to 375°F (190°C). Place the assembled pie on a baking sheet lined with parchment paper or a silicone baking mat to catch any drips. Bake for 50-60 minutes, or until the crust is golden brown and the filling is bubbly. Allow the pie to cool for at least 2 hours before serving to allow the filling to set.
There you have it, the perfect apple pie recipe straight from The Food Lab. This classic apple pie is a labor of love, with its tender apple chunks and golden, crisp crust. Serve it warm with a scoop of vanilla ice cream, and you’ll have a dessert that will impress your family and friends every time.
Tips for Pie Making
When it comes to making the best apple pie, The Food Lab has a few insider tips to ensure your pie turns out perfect every time. By following these expert recommendations, you’ll elevate your pie-making skills and impress your family and friends.
Use a Pie Shield or Foil
To prevent the edges of your crust from over-browning, The Food Lab suggests using a pie shield or foil. This simple trick creates a barrier that protects the delicate crust while allowing the filling to cook evenly. Place the shield or foil over the crust before baking, and remove it during the last few minutes to achieve a beautifully golden crust.
Place a Baking Sheet Below
To catch any potential spills or drips, The Food Lab recommends placing a baking sheet on the rack below your pie. This not only keeps your oven clean but also prevents any overflow from burning and affecting the taste and appearance of your pie. It’s a small step that can save you time and effort in cleaning up later.
The perfect finishing touch: a delicious homemade apple pie cooling peacefully on your kitchen countertop. But before you dive in, it’s important to exercise a little patience.
Allowing your pie to cool and rest for at least 2 hours before serving is crucial to ensure the filling sets properly. This waiting period helps the filling reach its ideal consistency, preventing it from being too runny or falling apart when sliced. So resist the temptation and give your pie the time it deserves.
Flavor Variations
The Food Lab believes that apple pie is a canvas for creativity and encourages bakers to explore different flavor variations. While their recipe focuses on the classic apple pie, there are endless possibilities for adding unique and delicious twists. By incorporating ingredients such as caramel, nuts, or spices, you can create apple pie variations that will surprise and delight your taste buds.
One flavorful option is to drizzle homemade caramel sauce over the apple filling before baking. The sweet and sticky caramel adds a luxurious touch and complements the natural sweetness of the apples. Another option is to mix in a variety of nuts, such as pecans or walnuts, to add a beautiful texture and nutty flavor to the pie. The combination of crunchy nuts and tender apples creates an irresistible contrast.
If you’re feeling adventurous, experimenting with spices can elevate the flavor profile of your apple pie. Consider adding ground cinnamon, nutmeg, or cardamom to the filling to create a warm and aromatic blend. These spices not only enhance the natural flavors of the apples but also provide a cozy and comforting aroma that fills your kitchen.
Remember, when adjusting the flavorings, it’s essential to taste and balance the sweetness and spices according to your personal preferences. Some bakers prefer a more subtle and delicate taste, while others enjoy a bolder and spicier profile. Don’t be afraid to get creative and tailor the flavors to suit your unique palate.
Whether you choose to stick with the classic apple pie recipe or venture into exciting flavor variations, the most important aspect is to have fun and enjoy the process of baking. Let your imagination run wild as you create your own signature apple pie that will make your family and friends beg for the recipe.
And if you need some inspiration, take a look at this mouth-watering apple pie below:
Serving and Pairing
After you’ve baked a delicious apple pie, it’s time to serve and enjoy the fruits of your labor. The Food Lab suggests serving apple pie warm or at room temperature to fully savor its flavors.
To enhance the taste experience, consider pairing your apple pie with delightful accompaniments. A classic choice is a scoop of creamy vanilla ice cream, which adds a cool and creamy contrast to the warm pie. The smooth texture of the ice cream pairs perfectly with the tender apple chunks and the flaky crust.
If you prefer a lighter alternative, a dollop of freshly whipped cream is an excellent option. The light and airy whipped cream add a touch of elegance to the humble pie, elevating its overall indulgence. Its subtle sweetness complements the flavors of the apple filling without overpowering them.
For those who are open to exploring unique flavor combinations, some diners enjoy a slice of sharp cheddar cheese alongside their apple pie. This unconventional pairing presents a delightful mix of sweet and savory, with the tangy richness of the cheese enhancing the natural sweetness of the apples.
Ultimately, serving and pairing choices come down to personal preferences. Whether you opt for the classic combination of vanilla ice cream, the elegance of whipped cream, or the unexpected twist of cheddar cheese, the goal is to experience a well-rounded symphony of flavors and textures that complement your homemade apple pie.
Storing and Reheating
After indulging in a delicious homemade apple pie, you may find yourself with some leftovers. To ensure the freshness of your remaining pie, The Food Lab advises storing it in the refrigerator. Simply cover the pie with foil and place it in the fridge, where it can stay for up to three days.
When it comes time to enjoy another slice of apple pie, you have two options for reheating: the oven or the microwave. If you prefer a crispy crust and don’t mind the extra time, reheating in a preheated oven is the way to go. Set your oven to 350°F (175°C), place the pie on a baking sheet, and warm it for about 10 minutes or until heated through.
If you’re short on time and don’t mind sacrificing a bit of the crust’s texture, the microwave is a quick and convenient alternative. Simply place a slice of pie on a microwave-safe plate and heat it on high for 30 seconds. Check the temperature and continue microwaving in 15-second increments until the pie is warmed to your liking. Be cautious not to overheat, as it can lead to a softer crust.
Remember to let the pie cool slightly before digging in to avoid burn hazards. Whether you choose to reheat in the oven or the microwave, covering the pie with foil during reheating will help prevent excessive browning and ensure an evenly heated slice.
Now that you know how to store and reheat your apple pie, you can savor its delicious flavors for days to come. Don’t let any slice go to waste!
Freezing Apple Pie
Did you know that you can freeze apple pie for future enjoyment? Whether you have leftovers or want to prepare a pie in advance, freezing is a convenient option. To ensure the best results, it is recommended to freeze the pie before baking it. This prevents the pre-cooked filling from becoming watery after freezing and thawing.
When freezing apple pie, it is important to store it properly. You can use a freezer-safe container or wrap the pie tightly in plastic wrap and aluminum foil to prevent freezer burn and maintain its freshness.
Before baking the frozen pie, it is crucial to thaw it first. Thawing in the refrigerator is the safest method as it allows for even and gradual thawing. Simply transfer the pie from the freezer to the refrigerator and let it thaw overnight.
Once the pie has thawed, you can proceed with baking it as you would with a fresh pie. Enjoy the delicious flavors of homemade apple pie anytime you desire, without the hassle of starting from scratch!

Troubleshooting Tips
While making apple pies is a delightful and rewarding experience, sometimes unexpected issues can arise. The Food Lab is here to help with some troubleshooting tips to address common apple pie problems.
1. Preventing Over-Browning
If you find that the crust of your apple pie is becoming too brown during baking, don’t fret! Simply cover the exposed edges with a pie shield or aluminum foil. This will protect the crust from further browning while allowing the filling to continue cooking to perfection.
2. Thickening Runny Fillings
In some cases, you may end up with a filling that is too runny. If this happens, you can use additional thickening agents to give it the perfect consistency. Try mixing in a bit of cornstarch to absorb the excess moisture and help the filling set properly.
3. Avoiding Mushy Apples
To ensure your apple pie has a perfect texture, it’s essential to avoid overcooking the apples. Keep a close eye on the baking time and remove the pie from the oven when the apples are tender yet still hold their shape. This will prevent them from becoming mushy and compromising the overall texture of the pie.
By following these troubleshooting tips, you’ll be able to overcome common pie problems and achieve a beautifully baked apple pie. Remember, practice makes perfect, so don’t be discouraged if you encounter any difficulties along the way. With a little patience and these helpful tricks, you’ll soon become a master of apple pie baking!
Conclusion
In conclusion, The Food Lab’s extensive research and experimentation have uncovered the secrets to creating the perfect apple pie. By carefully selecting the best apples, pre-cooking them to retain their texture, and following the recommended pie-making techniques, anyone can achieve a delicious and impressive homemade apple pie. These apple pie tips will guide you in mastering the art of pie-making and create a dessert that will have everyone coming back for more.
With The Food Lab’s recipe and techniques, you can confidently create a buttery, flaky pie crust that complements the tender apple filling. The balance of sweetness and tartness in the selected apples, such as Golden Delicious, ensures a flavorful pie. By pre-cooking the apples, you can enjoy chunks of apples that hold their shape, avoiding a soggy or watery filling.
Whether you prefer a classic apple pie or want to experiment with different flavors, The Food Lab’s tips and tricks provide a solid foundation for success. From serving the pie warm with a scoop of vanilla ice cream to storing and reheating leftovers, you’ll have all the information you need to make and enjoy the perfect apple pie. So, get ready to impress your family and friends with your baking skills and enjoy the delightful experience of savoring a homemade apple pie.