Have you ever wondered how to make your own vanilla extract at home? Well, wonder no more! We have a simple and cost-efficient DIY recipe that will elevate your baking to a whole new level. Forget about store-bought options – with just two ingredients and a little patience, you can create a flavorful and aromatic vanilla extract that will enhance all your homemade treats.
The Ingredients You Need for DIY Vanilla Extract
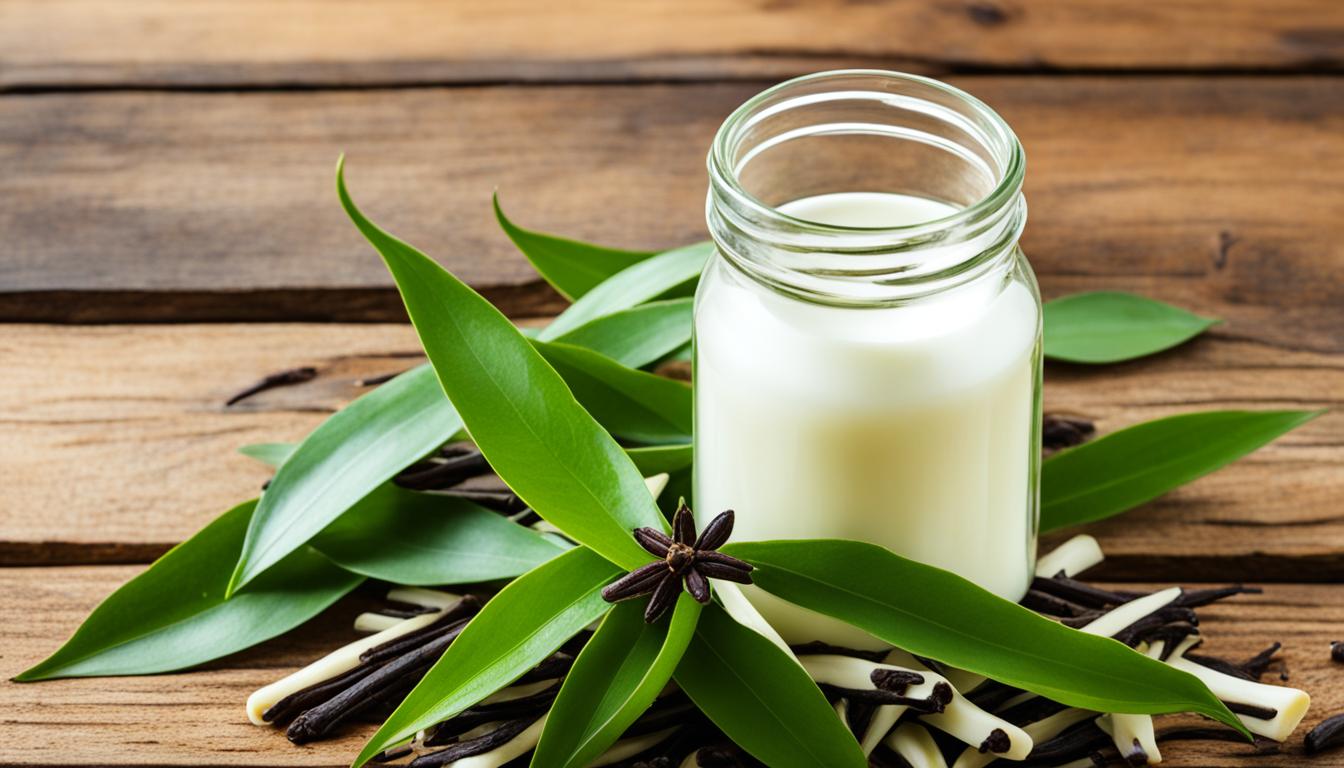
Making your own homemade vanilla extract is a simple process that requires just two key ingredients: vanilla beans and vodka.
When it comes to choosing vanilla beans, you can find them at most major grocery stores or conveniently purchase them online. The most popular choice for DIY vanilla extract is the Madagascar vanilla bean. It offers a creamy and rich flavor that is perfect for a wide range of recipes. However, you can also experiment with other varieties such as Mexican vanilla beans or Tahitian vanilla beans, each offering their own unique flavor profiles. Whether you choose Grade A or Grade B beans, you can still create a delicious homemade extract.
Now let’s talk about the alcohol. While vodka is the most commonly used alcohol for making vanilla extract, you can also get creative and use alternatives like bourbon, brandy, or rum. It is recommended to use 80 proof alcohol to achieve the best results. The choice of alcohol will impact the flavor of the final extract, so choose one that complements your taste preferences.
To store your homemade vanilla extract, you’ll need glass bottles or jars with a tight seal. These containers help preserve the flavors and keep the extract fresh. Additionally, using a funnel can make the pouring process easier and prevent any spills.
How to Make DIY Vanilla Extract
To make vanilla extract at home, follow these simple steps:
- Split the vanilla beans: Take the vanilla beans and split them lengthwise to expose the seeds. This will help release the flavor.
- Place the beans in a jar: Get a glass bottle or jar with a tight seal. Place the split vanilla beans in the jar.
- Pour the alcohol: Pour the alcohol, such as vodka, over the vanilla beans in the jar. Make sure the beans are fully submerged in the alcohol. If needed, use a little extra vodka to fully cover the beans.
- Seal and store: Seal the bottle or jar tightly. Store the vanilla at room temperature, away from direct sunlight. This will allow the vanilla to infuse and develop its flavor.
- Shake the bottle: Shake the bottle or jar once a week or every couple of weeks. This will help distribute the flavors evenly throughout the extract.
- Wait for the flavor to develop: The vanilla extract can be ready to use in as little as 8 weeks, but for the best flavor, it’s recommended to wait at least 6-12 months. The longer the extract sits, the better the flavor will become.
That’s it! With just a few simple steps, you can make your own delicious homemade vanilla extract. Remember to be patient and allow the extract time to develop its full flavor. The result will be a high-quality vanilla extract that adds a rich and intense vanilla flavor to all your favorite recipes.
Check out the image below for a visual guide on how to make DIY vanilla extract:
Choosing the Right Vanilla Beans for Your DIY Vanilla Extract
When it comes to making your own DIY vanilla extract, selecting the right variety of vanilla beans is essential to achieving the desired flavor profile. There are three main types of vanilla beans to choose from:
- Madagascar vanilla beans: These are the most common and widely available vanilla beans. Known for their creamy and rich flavor, Madagascar vanilla beans are a popular choice for homemade vanilla extract.
- Mexican vanilla beans: If you prefer a darker and smokier flavor, Mexican vanilla beans are an excellent option. They add a unique depth to the vanilla extract, perfect for adding complexity to your baked goods.
- Tahitian vanilla beans: For those looking to infuse their vanilla extract with floral notes, Tahitian vanilla beans are the way to go. These beans offer a distinct and fragrant flavor that can elevate your homemade creations.
No matter which variety you choose, all three types of vanilla beans can be used to make delicious homemade vanilla extract. The decision ultimately comes down to personal taste preferences and the flavor profile you wish to achieve.
Enhancing Flavor with Different Vanilla Bean Combinations
For those who want to explore even more flavor possibilities, combining different varieties of vanilla beans can result in unique and delightful taste profiles. Consider experimenting with a blend of Madagascar and Mexican vanilla beans for a rich and smoky flavor, or combining Tahitian and Madagascar vanilla beans for a floral and creamy infusion. Let your creativity guide you as you create your personalized vanilla extract.
The Role of Alcohol in DIY Vanilla Extract
When it comes to making your own DIY vanilla extract, the type of alcohol you use plays a crucial role in extracting the rich flavor from the vanilla beans. While vodka is the most commonly used alcohol, there are other options that can add unique flavors to your homemade extract.
Vodka: Vodka is the go-to choice for making vanilla extract. The neutral flavor and high alcohol content of vodka make it ideal for extracting the pure and smooth vanilla flavor from the beans. It allows the natural aroma and taste of the vanilla to shine through. It is recommended to use an 80 proof vodka for the best results.
Bourbon: If you’re looking to add a warm and rich flavor to your vanilla extract, bourbon is an excellent choice. This aged whiskey brings a delightful depth to the extract with its caramel undertones. The combination of vanilla and bourbon creates a complexity that is perfect for enhancing baked goods.
Brandy: Another option you can consider is brandy. It adds a sophisticated twist to your vanilla extract, infusing it with a subtle fruity and wine-like flavor. The smoothness of brandy complements the vanilla, resulting in an extract that adds depth and character to your culinary creations.
Rum: For those who prefer a sweeter and spicier vanilla extract, rum is a great choice. It adds a hint of sweetness and exotic spices to the extract, giving it a unique flavor profile. The richness of rum pairs well with the natural sweetness of vanilla, creating a truly indulgent extract.
Ultimately, the choice of alcohol for your DIY vanilla extract depends on your preference and the flavor profile you want to achieve. Whether you opt for vodka, bourbon, brandy, or rum, make sure to use an 80 proof alcohol to ensure proper extraction of the vanilla flavor.
By choosing the right alcohol and allowing your vanilla extract to mature over time, you can create a homemade extract that surpasses the store-bought alternatives in both flavor and quality. Now that you know the role alcohol plays in DIY vanilla extract, let’s move on to how to store and use your homemade vanilla extract in the next section.
Storing and Using DIY Vanilla Extract
Once you’ve made your own delicious DIY vanilla extract, it’s important to store it properly to maintain its flavor and potency. Proper storage and usage ensure that you can enjoy the rich and intense vanilla flavor in all your favorite recipes.
Storing Vanilla Extract
To store your homemade vanilla extract, find a cool, dark place away from direct sunlight. This will help preserve the flavor and prevent any degradation caused by exposure to light and heat. We recommend storing it in a pantry or kitchen cabinet. Avoid storing it near the stove or any heat sources, as heat can accelerate the evaporation of alcohol and impact the integrity of the extract.
For easy access and to keep the flavors evenly distributed, give your bottle or jar a gentle shake once a week or every couple of weeks. This will ensure that the vanilla beans infuse the alcohol evenly and intensify the flavor.
Using Vanilla Extract
Using your homemade vanilla extract in recipes is a breeze. It can be used as a 1:1 substitute for store-bought vanilla extract in your favorite baked goods. The rich and intense flavor of the homemade extract will enhance the taste of cakes, cookies, muffins, and more.
Remember, homemade vanilla extract can be continuously replenished by adding more alcohol as you use it. This means you can enjoy the delicious flavor of real vanilla for months or even years to come. However, if you are planning to give your extract as a gift or if you run out of alcohol for refilling, you can remove the vanilla beans after the first use. This way, the recipient can still enjoy the flavor while using their own alcohol to replenish the extract later on.
So go ahead and indulge in the wonderful world of homemade vanilla extract. Enjoy the rich and authentic flavor it adds to your baked goods and impress your friends and family with this delightful DIY creation.
Cost Efficiency of DIY Vanilla Extract
When it comes to making your own vanilla extract at home, cost efficiency is one of the major advantages. While vanilla beans may seem expensive, you only need a small quantity to produce a large amount of extract. For example, just six vanilla beans can yield one cup of homemade vanilla extract, which is equivalent to approximately $4 worth of store-bought extract. This cost comparison clearly demonstrates the potential cost savings of making your own extract.
In addition to the financial benefits, creating your own vanilla extract allows you to have control over the quality and strength of the flavor. Store-bought options often contain artificial or synthetic ingredients, which can compromise the depth and richness of the vanilla flavor. By making your own vanilla extract, you ensure the use of real vanilla beans and can tailor the strength of the flavor to your personal preference. This results in a superior product that enhances the taste of your homemade baked goods.
Making DIY vanilla extract is not only a cost-effective choice but also a rewarding one. With a simple investment in quality vanilla beans and alcohol, you can enjoy the satisfaction of creating a homemade pantry staple that elevates your baking and cooking to a whole new level.
Homemade Vanilla Extract as a Gift Idea
Looking for a unique and thoughtful gift idea for the baking enthusiast in your life? Consider giving them homemade vanilla extract. Not only is it a delicious and versatile ingredient, but it also shows effort and care on your part.
To make the gift extra special, bottle the homemade vanilla extract in decorative glass bottles. You can also personalize the bottles with printed labels for a professional touch. This attention to detail will elevate the overall presentation of the gift and make it truly standout.
Vanilla extract is a staple in any baker’s pantry, making it a perfect gift for those who love to whip up delicious treats. By giving homemade vanilla extract, you are not only providing them with a high-quality ingredient, but you are also offering them the opportunity to elevate their baking endeavors.
If you want to take the gift to the next level, consider pairing the homemade vanilla extract with other baking ingredients or tools. Create a DIY baking gift basket by including items like gourmet chocolate chips, premium flour, or a beautiful mixing bowl. This thoughtful and personalized gift will surely impress any baking enthusiast.