Welcome to our easy guide on how to clean and debeard mussels! If you’ve ever wondered about the best way to prepare these delicious bivalves or how to remove those pesky beards, you’re in the right place.
Mussels are not only a tasty seafood option, but they are also affordable and easy to cook. Whether you’re a seafood enthusiast or just starting your culinary journey with mussels, it’s important to know how to properly clean and debeard them before cooking.
In this article, we’ll walk you through the step-by-step process of cleaning and debearding mussels, ensuring that your mussels are grit-free and ready to be transformed into mouthwatering dishes. From buying and storing mussels to checking their freshness and giving them a final cleaning, we’ve got you covered.
Key Takeaways:
- Learn how to clean and debeard mussels for a delicious seafood experience.
- Discover the best practices for buying and storing mussels.
- Understand the importance of checking the freshness of mussels before cooking.
- Master the soaking and final cleaning process to ensure grit-free mussels.
- Explore different recipe options and enjoy the flavors of mussels in your own kitchen.
Buying and Storing Mussels
When it comes to mussel recipes and mussel dish preparation, buying and storing fresh mussels is crucial. Mussels are readily available year-round, with their peak season occurring from October to March. They are primarily farm-raised to ensure safety and filter out impurities from the water.
When selecting mussels for your culinary endeavors, there are a few key factors to consider. Look for mussels stored on ice, as this helps maintain their freshness. Ensure that the shells are tightly closed and undamaged, as a dull or open shell can be a sign of spoilage.
To further preserve the quality of the mussels, it is recommended to store them in the refrigerator for a couple of days. Place them in a container or a bowl covered with a damp towel to prevent them from drying out. This proper storage method will ensure the mussels remain fresh and ready for your cooking endeavors.
Tips for Buying and Storing Mussels
| Tip | Description |
|---|---|
| Look for closed shells | Choose mussels with tightly closed shells to ensure freshness. |
| Avoid dull or open shells | Dull or open shells are an indication of spoilage. |
| Store in the refrigerator | Keep mussels in the refrigerator for a couple of days, covered with a damp towel. |
Cleaning Farm-Raised Mussels
Farm-raised mussels are already relatively clean, but a rinse is still necessary to ensure their freshness and remove any remaining debris. Here are the steps for cleaning and preparing farm-raised mussels:
- Place the mussels in a colander or bowl.
- Rinse the mussels under cold water to remove any exterior debris or seaweed.
- Inspect the mussels for beards. Most farm-raised mussels come debearded, but you may find a few stubborn beards that need to be removed.
- To remove the beards, grasp them between your thumb and forefinger.
- Pull the beard towards the hinged end of the shell, exerting gentle pressure to detach it.
- Discard the removed beards.
By following these steps, you can ensure that your farm-raised mussels are cleaned and ready for cooking. Removing any debris and beards not only enhances the visual appeal of the dish but also prevents any unwanted grittiness.
Remember to handle the mussels with care and be gentle when removing the beards. This will help preserve the integrity of the shells and prevent any accidental damage.

Why Should You Clean Farm-Raised Mussels?
Cleaning farm-raised mussels is an essential step in their preparation, even though they are relatively clean compared to wild-caught mussels. While farm-raised mussels are grown in controlled environments and have minimal exposure to contaminants, rinsing them removes any residual debris or seaweed that may be present on the exterior.
Additionally, some farm-raised mussels may still have beards attached, which require removal. By cleaning and debearding the mussels, you ensure that they are free from any potential impurities, resulting in a more enjoyable culinary experience.
| Cleaning Farm-Raised Mussels | Benefits |
|---|---|
| Rinse under cold water | Removes debris and seaweed |
| Remove beards | Eliminates potential grittiness |
Checking the Freshness of Mussels
When it comes to cooking a delicious dish with mussels, it’s crucial to ensure they are fresh and alive. Here are a few simple steps to check the freshness of your mussels:
- Pick up any open mussels and give them a gentle squeeze or knock them against another mussel. If the mussel slowly closes itself, it is alive and safe to consume. However, if it remains open, it is dead and should be discarded.
- After cooking, you may encounter some unopened mussels. It is safe to crack them open to access the meat inside as long as they were alive before cooking.
By checking the freshness of your mussels, you ensure a flavorful and enjoyable dining experience, free from any potential risks.
Freshness Indicators for Mussels
| Indicator | Alive | Dead |
|---|---|---|
| Gently Squeeze | Closes Slowly | Remains Open |
| Knock Against Another Mussel | Closes Slowly | Remains Open |
| Still Closed After Cooking | Safe to Open | N/A |
Soaking and Final Cleaning
To ensure your mussels are free from sand and impurities, it’s important to soak them before cooking. Follow these simple steps to prepare your mussels for a delicious dish:
- Soak the mussels in fresh water for about 20 minutes. This allows them to filter out any sand and expel any excess salt.
- After soaking, carefully transfer the mussels to a clean bowl of cold water. Be cautious not to pour the dirty water back onto the mussels.
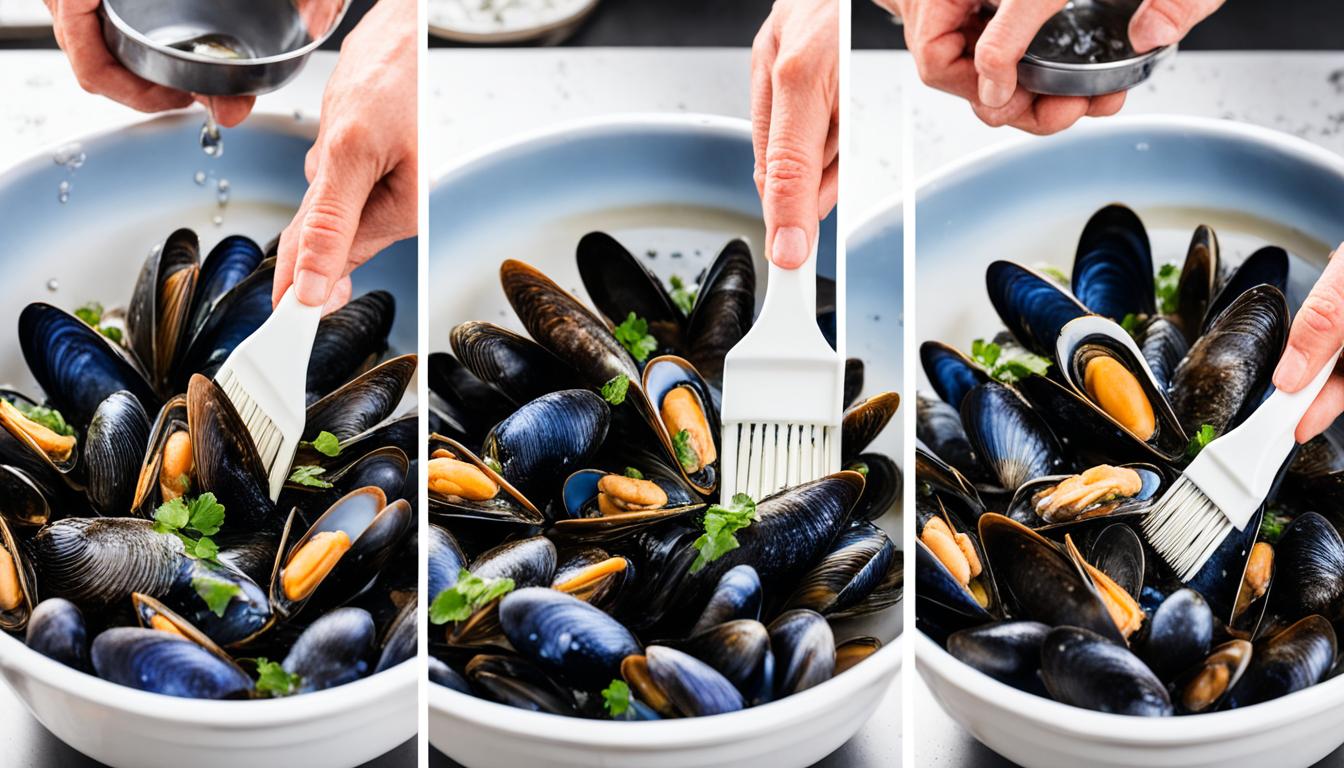
- Using a firm brush, gently scrub the mussels to remove any additional sand, barnacles, or other debris that may be attached to the shells.
- Rinse the mussels under cool tap water to ensure they are thoroughly clean.
- Finally, dry the mussels with a clean towel before proceeding with your chosen mussel recipe.
Following these steps will guarantee that your mussels are clean, fresh, and ready to be cooked in a variety of delicious recipes.

Benefits of Soaking and Final Cleaning
Soaking and final cleaning of mussels provide several benefits:
- Removing sand and salt: Soaking allows mussels to cleanse themselves of any sand or excess salt, ensuring a more enjoyable eating experience.
- Enhancing flavor: By removing any debris, you allow the natural flavors of the mussels to shine through in your dish.
- Improved texture: Proper cleaning helps prevent unwanted grittiness in the final dish, ensuring a smooth and enjoyable texture.
By incorporating soaking and final cleaning into your mussel preparation routine, you’ll be able to create delicious and satisfying mussel recipes that are sure to impress.
| Benefits of Soaking and Final Cleaning |
|---|
| Removing sand and salt |
| Enhancing flavor |
| Improved texture |
Conclusion
Preparing mussels for cooking is an easy and essential step in creating delicious mussel recipes. By buying fresh mussels and properly storing them, we ensure the quality and safety of our dish. Cleaning mussels by rinsing them, removing any beards, and checking for freshness ensures a grit-free and enjoyable seafood experience.
Experimenting with different mussel recipes allows us to fully appreciate the unique flavors and elegance that mussels bring to the table. From classic dishes like Moules Marinières to innovative creations like Thai-inspired curries, mussels offer a versatile and delectable choice for seafood lovers.
So next time you’re considering a seafood dish, give mussels a try. With the proper preparation and a touch of creativity, you’ll be able to savor the delightful taste and wholesome goodness of these bivalves. Cook, enjoy, and relish the natural bounty of the sea!